Week 38: Shower Tile, Great Room Beams & Corbels

This week the major work was tiling…of course.  Matt’s subs are pretty slow at tiling, but they take their time and install it right.  And really plan out where all of the cuts are going to be in the room before they get started.  So that’s really nice to see.  And that’s the reason that we stuck with the tiling company even though choosing the tile with the designer lady was WAY more complicated than it needed to be.  That said, the install job is looking really good and I think the patterning of the tile is really turning out great.
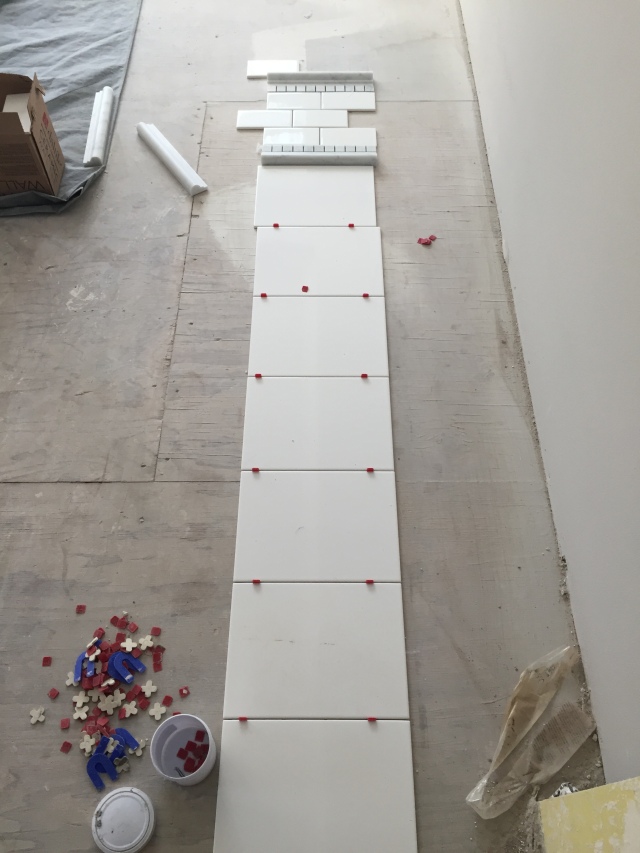
This is the layout of the tile in the master shower. The lower & larger white tiles will be in a brick pattern, then there will be a detail band and then white subway tiles above it.
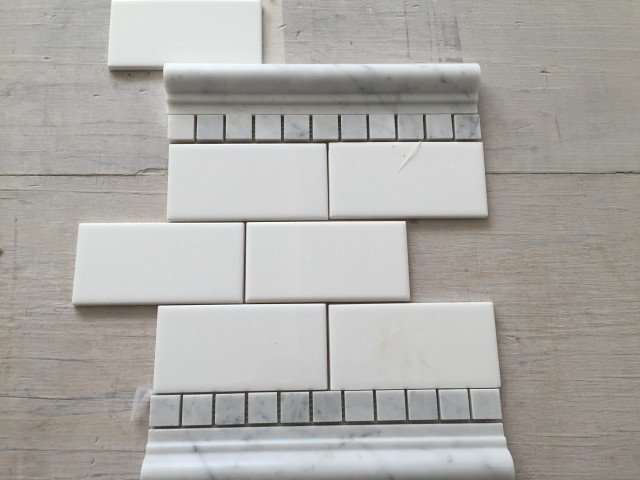
This is the layout of the tile in the master shower. The lower & larger white tiles will be in a brick pattern, then there will be a detail band and then white subway tiles above it.

The detail band in the master shower will be separated by a cararra marble chair rail and a row of 1" cararra tiles.

The detail band in the master shower will be separated by a cararra marble chair rail and a row of 1″ cararra tiles.
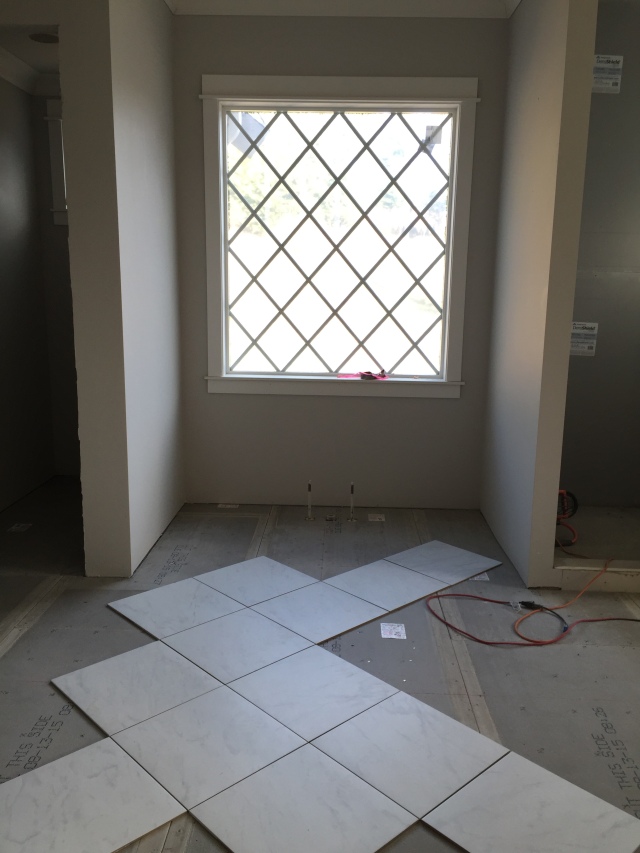
In the master bath we decided to turn the floor tiles "on point" which mimics the window grids.  This was just a dry run of it, but I have a hunch that it'll look great!  

In the master bath we decided to turn the floor tiles “on point” which mimics the window grids.  This was just a dry run of it, but I have a hunch that it’ll look great!

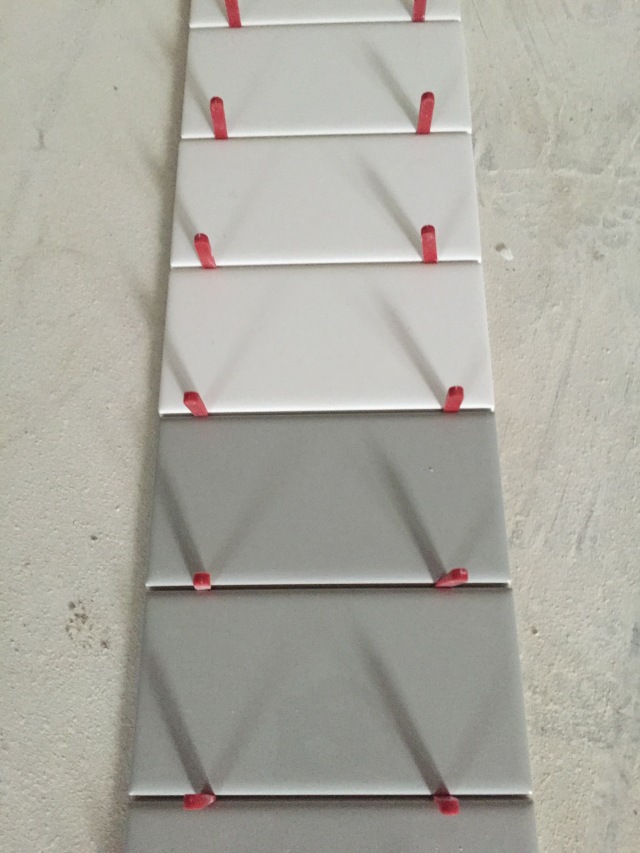
In the guest bath shower we had them create stripes of gray and white subway tiles and 1' each. I absolutely love how this is turning out!

In the guest bath shower we had them create stripes of gray and white subway tiles and 1′ each. I absolutely love how this is turning out!
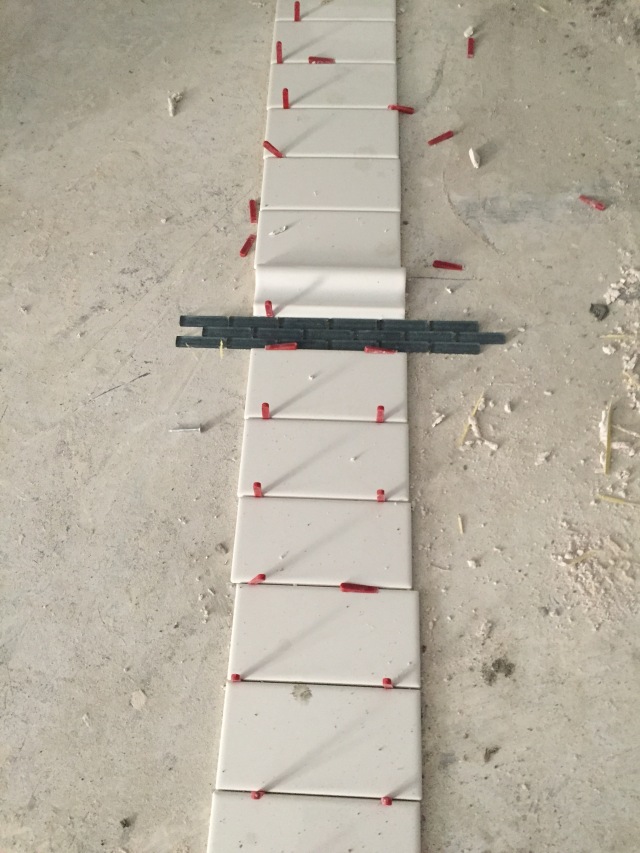
This will be the layout in the boys' bathroom. pretty simple - there will be wainscoting of subway tile (in a brick pattern) for the entire shower room with 3 rows of a blue-gray glass tile detail then a chair rail. All of that will continue into their shower and we've added more subway tile above it to the ceiling. This is just the rough layout on the floor to get the spacing right - it'll be fun to see it on the walls next week.

This will be the layout in the boys’ bathroom. pretty simple – there will be wainscoting of subway tile (in a brick pattern) for the entire shower room with 3 rows of a blue-gray glass tile detail then a chair rail. All of that will continue into their shower and we’ve added more subway tile above it to the ceiling. This is just the rough layout on the floor to get the spacing right – it’ll be fun to see it on the walls next week.

In addition to getting to see preliminary layouts for the showers, we also got to see the faux beams in the great room – and they look fantastic!  I am so happy with the way that they’ve turned out…they look fantastic!  And I know they’ll look even better painted next week.
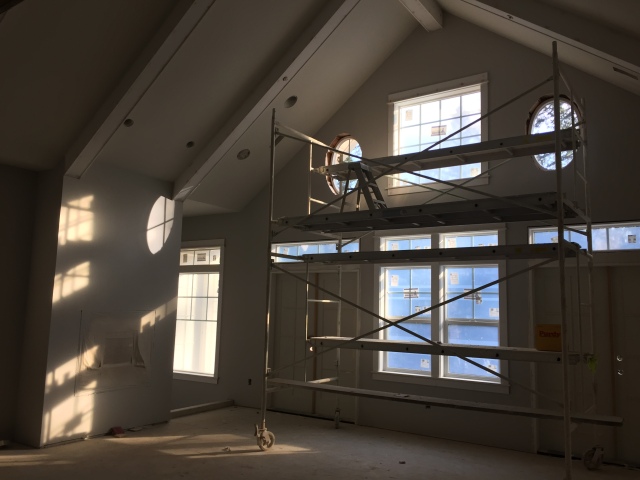
The guys did a such a great job on the beams in the great room. I honestly have no clue how they create them so perfectly, but I think they look great!
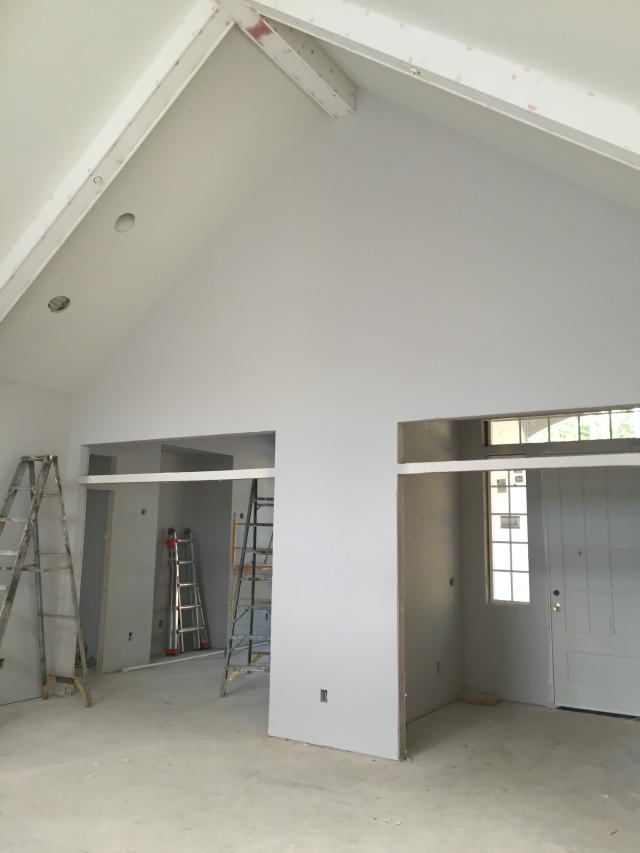
The guys did a such a great job on the beams in the great room. I honestly have no clue how they create them so perfectly, but I think they look great!

Here's a better representation of the colors in the room. The white beams look fantastic...and they're only primed!

Here’s a better representation of the colors in the room. The white beams look fantastic…and they’re only primed…and bondo’d.  This picture is looking back at the front entry on the right and the opening to the dining room on the left.  Really not sure what we’re going to put in that huge wall space above these doorways…probably nothing for quite a while.
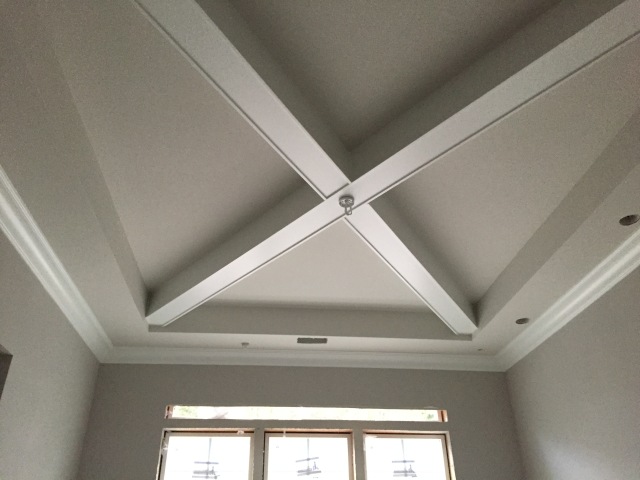
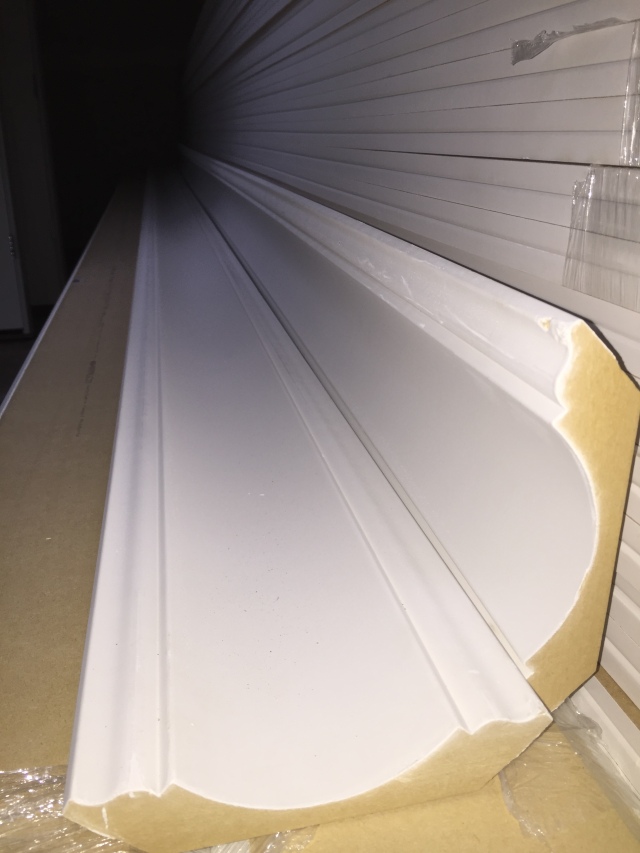
The crown moulding was installed in the dining room, entry, master bedroom and master bathroom this week as well. The trim in the dining room was also painted the final color. YAY!!!

The crown moulding was installed in the dining room, entry, master bedroom and master bathroom this week as well. The trim in the dining room was also painted the final color. YAY!!!

The window trim in the kitchen look like they're getting ready to be sanded and painted too.

The window trim in the kitchen look like they’re getting ready to be sanded and painted too.

On the exterior of the house, the siding subs came back to finish up some of the miscellaneous details – like the corbels.  They had to custom make all of the corbels (which are the small pieces of wood underneath the “bump out” parts of the gables).  We never talked about picking these out so It was awesome to see that they made them look like exactly what I drew!  I couldn’t be happier with them!  They also finished the front of the house where the mudroom door is.  Since that door was installed after the siding was done, they had to come back and finish that up.

The siding subs came back this week to custom make and install the corbels on the exterior of the house.
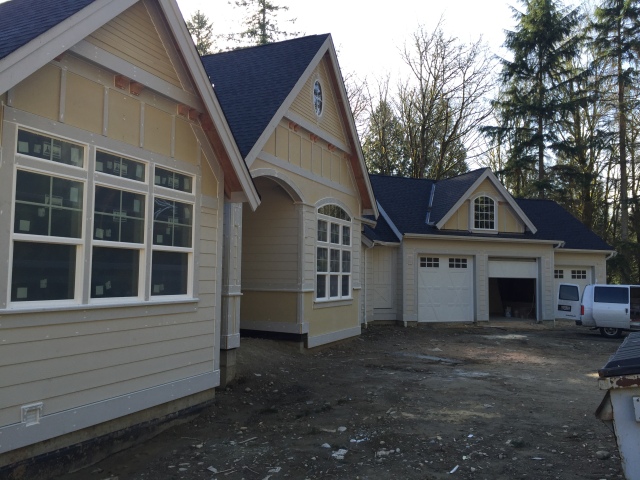
The siding subs came back this week to custom make and install the corbels on the exterior of the house.

It's been a while since I posted exterior pictures so I thought I'd add a few since it was a sunny day. Plus, don't the corbels look great?!

It’s been a while since I posted exterior pictures so I thought I’d add a few since it was a sunny day. Plus, don’t the corbels look great?!

I love every time I pull up to the front of the house. Just a couple more months and we'll be doing that every day!

I love every time I pull up to the front of the house. Just a couple more months and we’ll be doing that every day!
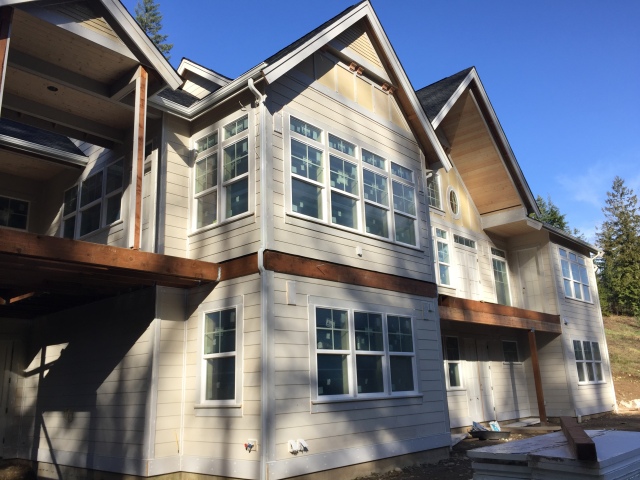
The back of the house turned out great, and the corbels look really nice too.

The back of the house turned out great, and the corbels look really nice too.

Here's a view of the back of the house, standing by the guest room and looking up underneath the gables.

Here’s a view of the back of the house, standing by the guest room and looking up underneath the gables.

On Thursday this week I flew to Phoenix to spend time with my friend Neely and on Saturday we flew to Las Vegas to see Boyz II Men in concert.  That was a TON of fun…and a good break from the everyday stresses of life for a quick fun girls’ weekend getaway.  The concert was amazing too…I’d easily go back and see them again!

We were anxiously awaiting the concert to start!

We were anxiously awaiting the concert to start!

They were absolutely, 100%, amazing. If you have a chance to ever see them, I'd definitely do it!

Boyz II Men were absolutely, 100%, amazing. If you have a chance to ever see them, I’d definitely recommend it!
 

Week 37: Tile and Trim Tribulations

The faux beams and crown moulding in the kitchen were installed and look fantastic!!  I absolutely love how it turned out.  Everything is so symmetrical too!  I really would have noticed if we didn’t center the beams and make each of the spaces the same size.  A bit more planning than what we had in the original plans, but well worth the extra time I spent figuring that out.  Matt’s subs did a great job with it too.  They’re 8″x8″ but it feels deeper than that.  I’m glad we didn’t have them make them any bigger too – this size seems perfect.  It adds just the right amount of dimension to the room without being overbearing.

The rest of the week was more than a little frustrating though.  I got a call mid-week letting me know that unfortunately the tile we picked out for the guest bath floor and the master bath floor (same tile) couldn’t be set in a brick pattern and that it had to be done at 1/3 offset.  I’m actually not a huge fan of the 1/3 offset, and I already had to have it in the mudroom and the boys’ bathroom.  So I definitely didn’t want to have it in the guest and more importantly in our master bath.  And, come to find out there’s actually two ways to install tile in a 1/3 offset (see below).

Of course, I had no idea there were two ways of installing tile in a 1/3 offset, and I much prefer the second “stepping” option layout. Unfortunately, nobody told me there were actually two ways of doing it and they already installed the boys’ bathroom in the first option which I really don’t care for.  Then come to find out they already installed a few rows of the guest bath in the same pattern without even discussing it with me!  Luckily they ripped it out pretty easily and they are going to change it to the “stepping” option that I liked.  As for the boys’ bath – they already installed it, and they did a really good job installing it…it’s just in the wrong pattern than I was ever expecting.  Honestly, it’s fine though – we’re just going to keep it as is and let it be.  I doubt the boys will ever know the difference anyhow…I doubt Joel will either 😉  For our master bathroom though – I really didn’t want to have the 1/3 offset installed in there.  So we ponied up more money to have them install the tile “on point”…rotated 45 degrees to a diamond pattern.  There’s more cuts involved in this layout so we had to buy more tile and the labor is more expensive.

2016-02-25 09.32.35

The boys bath floor was installed in the 1/3 offset pattern that I really wasn’t fond of. Luckily (if you can call it that), they also installed the flooring in the opposite direction than what I wanted. So the incorrect 1/3 layout is definitely less noticeable from the doorway. At least they did a good job on the install!

The crazy thing is that when I went over to check out the tile situation (about it being installed incorrectly in the guest bath) I noticed that all of the window trim had been installed.  And of course there was something with that too!  I honestly was cringing even having to tell Matt that there was something wrong with that too…but I did.  And it caused a HUGE argument.  Ugh.  A bit of a miscommunication on our part.  I had sent him a picture of what I wanted the window trim to look like and a link to a website that gave all of the dimensions for each trim piece.  He looked at the picture, but not the link.  Then called me to ask if I was ok with a 5″ top piece because that’s what’s standard on most windows.  I wasn’t at a computer so I said, “yep, that’s fine, it’s going to match the picture, right?”  Not realizing that he never actually clicked on the link, 5″ turns out to be too short…it should have been 6″.  So annoying.  So now we’re having to paying to rip them all down and install the taller top piece.  And I fully realize that it looks ‘ok’, but to me it looks really squatty and not in the correct proportions.  I honestly don’t want to live with it like that.  Better to fix it now than when it’s already caulked and painted!

2016-02-17 07.16.09

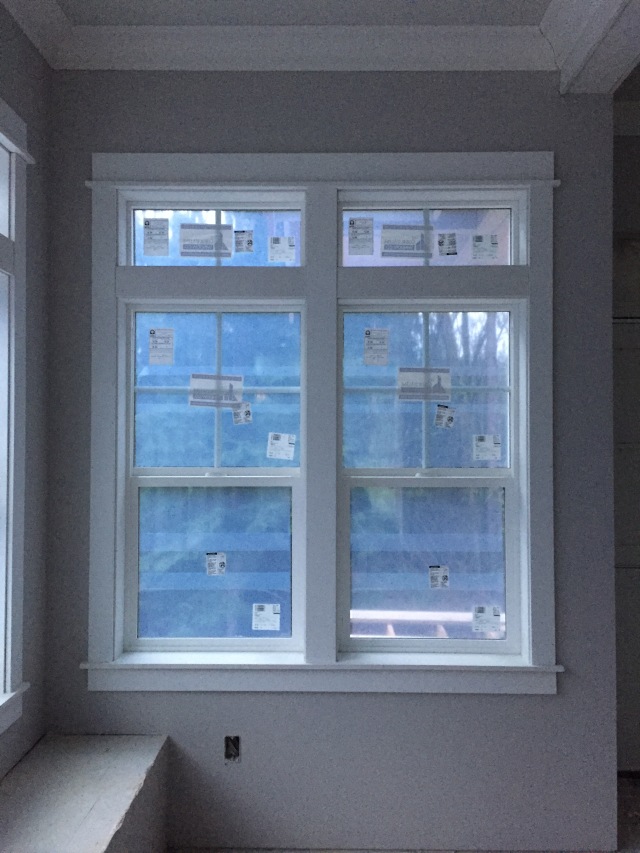
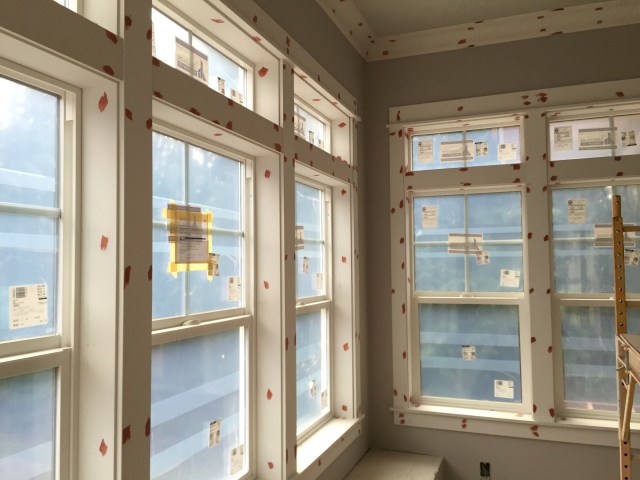
The piece on top just doesn’t look right to me – it’s simply too small. I can’t wait for it to be redone with the correct size trim.  And I’ll be excited once all that film to come off the windows too…oh for the day that they’re finally done building!

Week 36: Millwork & Tile Prep

I went out on Tuesday morning to check out the paint color…just to see it one more time and I think I’m getting more used to it.  So that’s good!  But even better was that I saw the ceiling in the dining room.  The guys worked on it all day Monday and it looks phenomenal!  I texted Joel some pics of it because I was so excited – they turned out so great!!!

2016-02-09 07.32.18

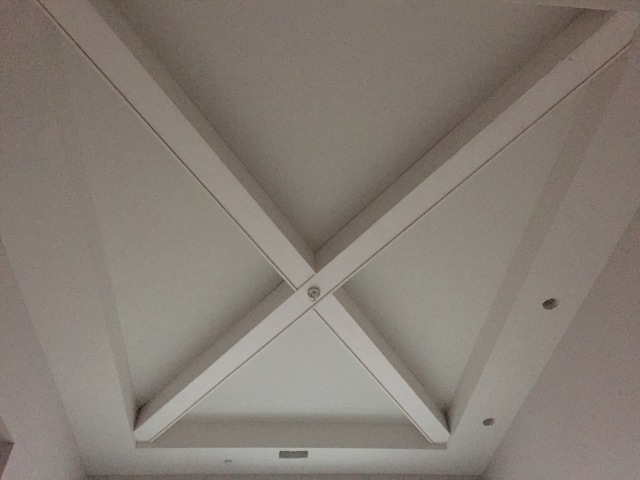
The X beam in the dining room ceiling looks so fantastic. Definitely a fun detail and it’s just something different that’ll make our home more unique. Well worth the effort the guy put in all day Monday in creating it!

By the end of the week, they had the entire ceiling in the kitchen done as well.  All of it is turning out so great, and I’m really liking the crown moulding that we picked out as well.

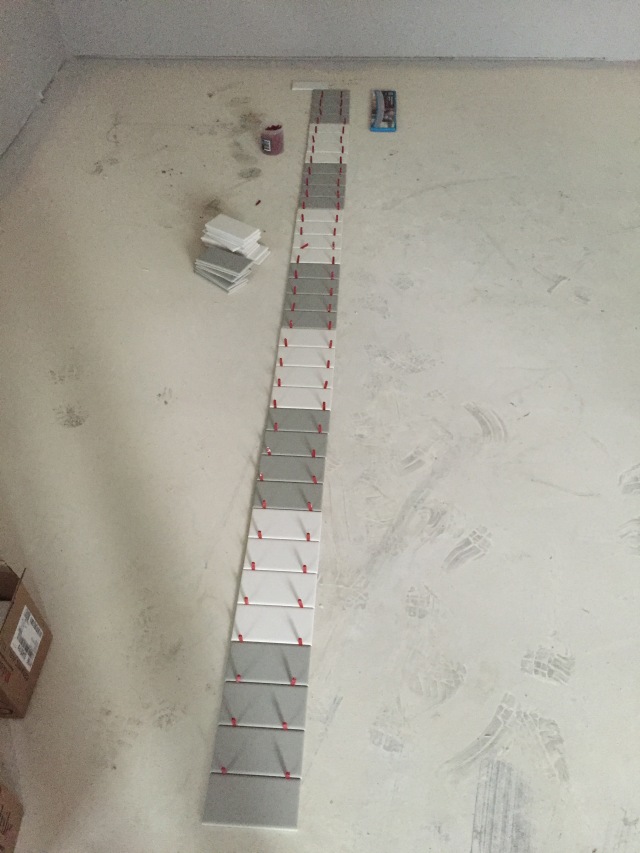
The garage is now a major construction area and is filled with all of the millwork and the tile backer boards for the house.  And the tile I selected is starting to arrive as well.  There’s boxes of tile in the garage as well as near the bathrooms in the house.  The tile sub has already prepped the boys bath and the guest bath for tile and even laid out some to show us how  big the grout lines are going to be.  The guest bath’s shower will be gray and white subway tile in a stripe pattern which they contractor laid out on the floor in the rec room.  It’ll be brick set, not square set like they did here – but it gives us a good idea of what the finished shower will look like.

On Sunday this week we also met our new neighbors – Sarah and Jeff.  They purchased the empty lot next to ours and will hopefully break ground on their home sometime in 2016.  We showed them around our house and shared some lessons learned that we had from our building/permitting process.  They’re going to be building what they called a “northwest modern” home.  And they’ll be building a one story + basement home just like us, which will fit well with their property grades.  Their house will have the master on the main level and three bedrooms downstairs like us too!

2016-02-13 12.16.28

And of course, it’s Valentine’s Day today – Happy Valentine’s Day from our little Spence!

2016-02-14 16.27.28

And check out the tile we ordered for our Master…how fitting for Valentine’s Day!? LOVE!!

Week 35: Painting the Interior- The WRONG Color

I’ve felt like the past couple of weeks have been pretty stressful when it comes to the house selections.  Final selections needed to be made on the tile and the woman at the company we’re going with to purchase and install the tile has got to be the absolute worst person that I’ve ever had to deal with.  I’ve already ranted about her a couple weeks ago, but her ridiculousness just keeps getting worse.  She is consistently getting things wrong and I have to back check everything she does.  I honestly feel like she’s one of those people that just tries to rip people off.  I literally told her to delete some of the tile for the boys’ backsplash and after doing that, the price of the backsplash INCREASED.  Then I have to call her out on it and she’s says crap like, “oops, not sure how that happened,” or “my computer has gremlins.”  Every change is like that.  And I feel bad for her other clients who don’t pay close attention because I’m 100% positive that she overcharges people.  It’s unbelievable.  Anyhow, I think that I’m about 95% done with having to deal with her from now on out…so that feels good!

But then something even worse happened – I went out to the house and they painted the ENTIRE HOUSE the WRONG color!!!!  Aaaahhhhh!  I visited on Thursday to talk with Matt and the paint job looked great, which it does – there’s a clean crisp line between the wall and the ceiling which looks really good.  But all day I kept thinking that it felt dark in there after I left.  So Friday morning when I went out there to pay Matt, I brought out the sample board that I had painted our color selection (Farrow & Ball’s Cornforth White @ 50%) and immediately we both knew that they painted it the wrong color.  Instead of reducing the paint saturation by 50%, they painted it the full 100% color.  So the ‘color’ is correct, but it’s a lot darker tone than I ever wanted it to be.

Matt said that since the tile guys and trim guys are going to start on Monday that if it needed to be repainted I have a while to think about the color and what I wanted to do.  Clearly it was the painter’s mistake (since I had written direction on the exact color I wanted), so they’d have to repaint it later.  Well, about an hour after getting to work, I got a call from Matt saying that if we want it repainted, that they’ll do it, but it needs to be done now before all of the trimwork goes in.  With the amount of windows and doors in our house, to have them tape everything off later and repaint was going to add a significant amount of cost & time for the painters.  So I need to make the decision if it needed to be repainted…TODAY.  My mom was busy spending time with one of her friend’s today so couldn’t help me out and I desperately felt like I needed a second opinion that wasn’t a guy’s (Matt’s or the painter’s).  Luckily my friend Sarah was around and met me there at lunch!  And luckily her hubby Kevin was working from home and could watch their adorable daughter while Sarah spent some time looking at paint colors sans kiddo.

We both agreed – Cornforth White looks good, and although it’s not a dark color, it’s definitely not light and airy either like the tone at 50% looks, which is the feeling I was going for.  But is it worth having them repaint the entire house?!?

On first blush, I’d think – the painter screwed up, have him repaint it.  But then I start thinking about the repercussions…it’ll delay the other subs that would have started a week, which means they’re out of work for that week and I guarantee that they’ll be disgruntled and rushing through our job to try to finish on time.  So is that really what I want?  The tile and trimwork guys to be angry and hurried?  Not really.  And then, the painter was supposed to do some extra work for us that was never included in the initial scope of work/bid which included painting some additional colors in the boys bedrooms & dining room, painting the ceilings a different color than the walls, painting the risers on the stairs, extra millwork, etc.  And, as ALL CONTRACTORS do – if I had him repaint the entire house, the cost for all these extras will be more than what they should have been to help him recoup some of the costs he incurred repainting the house.  So then I know I’d end up paying more than I should have.  Ugh.

Alternatively, if I keep the color that’s already on the walls – we have quite a bit of negotiating power and all of those extra items that were never in the scope, the painter will now have to do at no cost.

After lots of input from Sarah, and Matt pretending he’s a chandelier holding up spot lights for us, I walked away thinking that I’ll leave the color for now and after all of the finishes are installed – like the flooring, trim, cabinets – I may want them to repaint the great room & rec room.  It’s really hard to tell how it’ll all look once the finishes are in, lights are on, and the film is off all of the windows – who knows, maybe it’ll look great! (Here’s hoping)!

It’s been a couple of days and I’m STILL really not sure what the right choice to do here was, but it’s only paint – and that’s the easiest thing to change in a house.  So if we hate it later, I guess we’ll be repainting it.