Week 47: Moving, Appliances, Lighting, Tile & Grading

This week was a whirlwind of a week for us.  The major thing this week was moving.  Yep, we had to move and our house isn’t even done yet.  The lease for the rental house we were in a couple miles from the build went month-to-month after January and although we were supposed to be able to stay as long as we wanted the owners wanted to move back in on May 1st!  Can you believe it?  So we talked with Matt to see how fast things could go to hurry things up and he said that we could move in on Saturday, May 7th.  So between May 1st and May 7th we needed to move in with MY PARENTS!  I never thought we’d have to move back in with my parents, but since it was just a week, I figured that I could deal with the commute and suck it up.  We actually were at Cameron’s lacrosse tournament in Eastern Washington this weekend so Joel and I took the day off on Wednesday and Thursday to get us all moved.  That meant Thursday night we were shackin’ with my parents.  To get us moved, my mom and I went to the new house to clean out the garage and vacuum up as much sawdust as possible.  Then we went back home to help Joel and the movers with the remainder of the packing and moving.  Surprisingly it all of our stuff fit in the new 3-car garage and after covering it with plastic we’re hoping that it doesn’t get covered with more construction dust over the next week.  I can’t wait until next week when we can actually move all of our stuff into the new house though…it’s going to be so exciting!

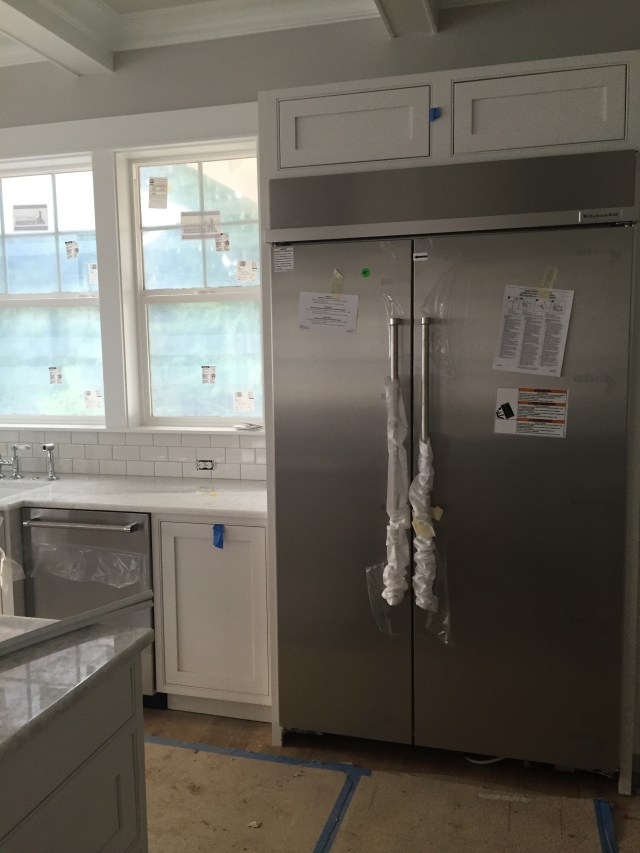
Besides moving, we also had all of the appliances installed!  We ended up choosing KitchenAid’s professional series and I love them!  They fit in the space perfectly and really look great…couldn’t be happier.  Of course, we haven’t used them yet 😉

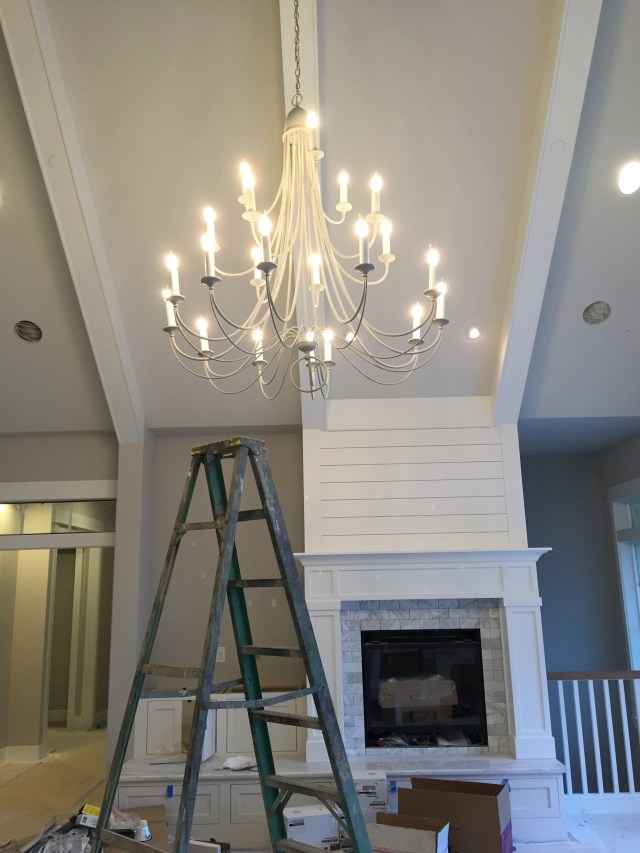
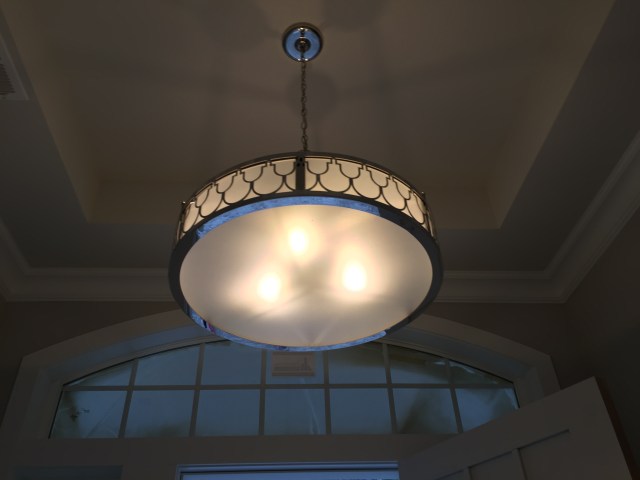
More lighting was installed this week too.  Some of the rooms weren’t 100% finished, so they had to come back and finish up the install.  I’m really happy with all of the light fixtures that we chose and think that they really add a lot of personality for each of the rooms.  And the exterior lights were even installed!  One piece of glass was broken and besides that they look fantastic…definitely better than I had thought they would.  The oil rubbed bronze really pops against the white house and adds some much needed accents.

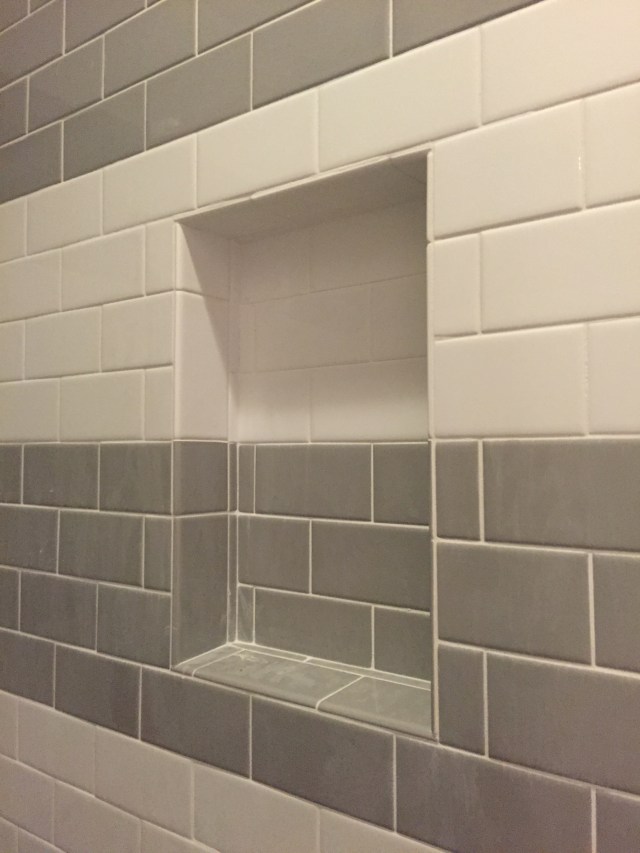
Finally I the majority of the tile was finished up this week – all except the vanity backsplash in the guest bath.  The Oceanside glass tile arrived and was installed in the powder room and looks phenomenal. It’s got the right amount of texture and shine for that room.  Besides that new install, all of the tile was grouted in the vanities for the master bath and the kitchen.  They turned out great and I honestly wouldn’t change any of it.

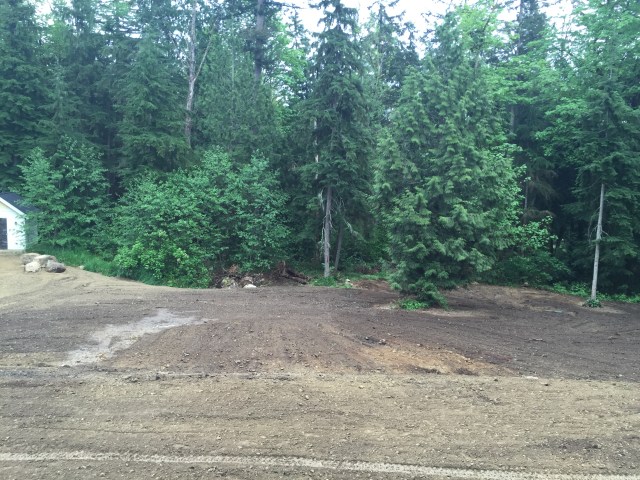
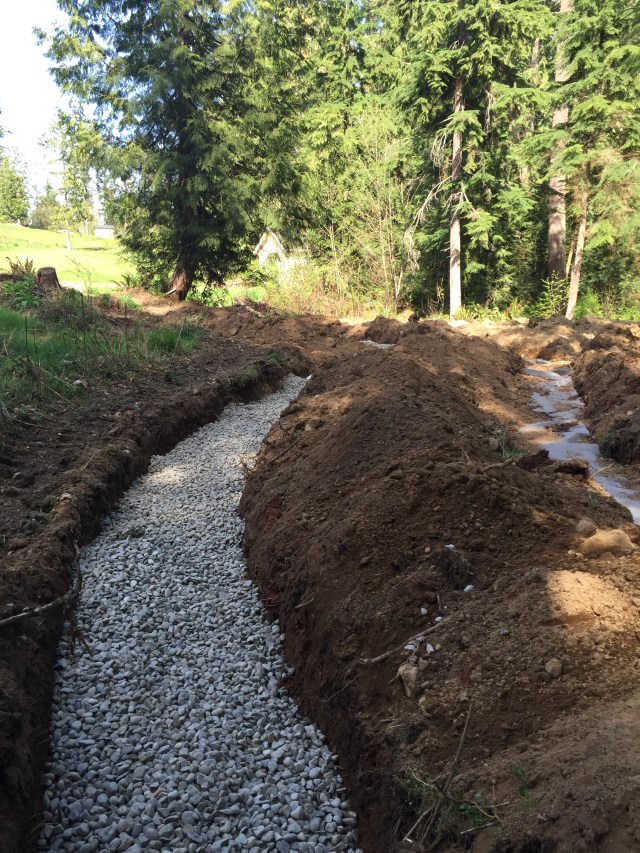
Finally, the backyard was graded out this week.  They had to finish backfilling over the septic drainfield as well as installing the drywell.

2016-04-22 16.01.22

The backyard is going to be so much fun for the boys to run around in this summer –

And, this weekend Cameron’s team WON the lacrosse tournament in tri-cities!!  Way to go wolves!!!

2016-05-01 15.24.34 HDR

Eastlake 3/4 Cardinal Team won the 3 Rivers Lacrosse Shootout this year! Whoo hoo!!!

Week 46: Transoms, Plumbing, HVAC, Lighting & Exterior Painting

This week was quite the week – Matt started off the week saying that our house was going to be a zoo and it definitely was!  Since all of the trim inside has finally been painted, a bunch of the subs could begin their work.

Transoms

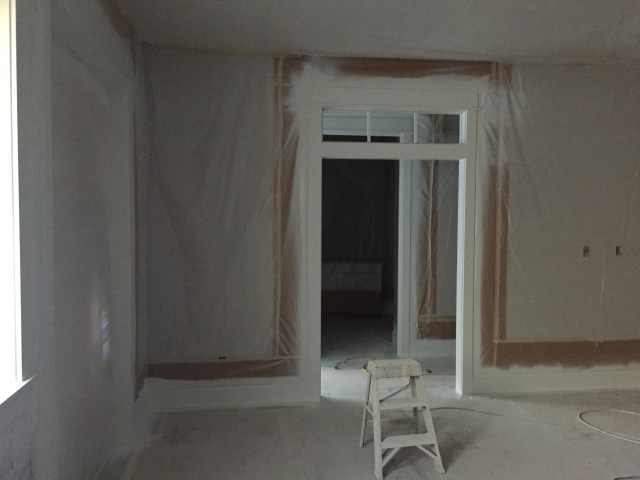
The interior transoms were completed this week which included having each piece painted, the glass installed, and putting the final trim up.  They look fantastic too!  I love how they help divide the rooms up but still make the rooms feel open to each other.  We toured a couple of homes that had these and knew that we definitely wanted them in our house.

2016-04-23 14.08.50

Transoms were added and painted this week. We contemplated buying them pre-made but now I’m glad we had them custom made on site…they look fantastic!

Plumbing

A lot (but not all) of the plumbing fixtures were installed this week and they’re looking good!  My mom and I were out there on Tuesday to choose where we wanted each piece of the plumbing fixtures (the slab guys were there to drill the holes).  And then the plumbers were also there to install the fixtures.  My favorite faucets hands down are the ones in the kitchen. We ended up choosing Rohl’s high arc country kitchen faucet with the sidespray and the filtered water faucet.  The filtered water faucet was actually cheaper to install at the sink than to have it built-in to the fridge.  And this way I’m actually gaining fridge/freezer capacity and don’t have to worry about the kids spilling water on our hardwoods.  Plus, it’s such a cute faucet…who could resist?!?

All of the other faucets except for the guest bath sink faucet was installed – and they still need to install most of the shower parts & pieces in the house.

HVAC

The HVAC guys were at the house this week installing our thermostats – of which we chose NEST.  I like that they have one app for everything – including smoke/carbon monoxide detectors and we’re hoping that they stay more up to date with their apps & technology as compared to the other thermostat brands.  We’ve heard good and bad things about NEST but hopefully in the long run it’ll work out for us that we invested in that technology.  The HVAC guys also installed all of the “trim” for the house – including the vent covers and intake vents.  One word of warning – these guys had FILTHY hands – which I can now see all over our white ceilings.  Next time I’d definitely ask them to wash their hands before installing all of the vents – I guess I need to teach more than my kids to do that, apparently it’s not common sense for adults yet.  The HVAC guys also installed our heat pumps this week too – they’re back under the mudroom deck and since we’ve had some warm days – it’s already been tested and the cooling is definitely working!

Lighting

I took a couple days off this week and my mom and I headed to the house to help with the lighting – placement, heights, etc.  There’s so many different lights in the house, and although I’ve labeled them the best that I can, we still needed to be on site to help with the placement.  I absolutely loved picking out all of the lights for the house though.  Matt said that most people would go to a lighting showroom and pick all the lights out from one person and be done with it.  Of course, I did this with the plumbing and really didn’t like it – I ended up having to choose plumbing fixtures from tiny images in a catalog.  So for the lighting I bought everything on my own and just had them there for the electrician to install.  This meant that I could buy them from wherever I wanted and I was able to buy them when places were having sales.  Most of my fixtures I acquired over the last year and did end up getting really good deals on them including some favorites from Pottery Barn and Restoration Hardware.  But other ones I was able to buy vintage light fixtures and refinish and rewire to make them workable for our home.

Two “schoolhouse” light fixtures I purchased from Second Use in Seattle and they’re actually from Joel’s elementary school in Tacoma!  In September of 2015 Wainwright was demolished to make way for a new intermediate school and Second Use was able to save some of the original fixtures – of which I was able to buy two of them.  After a quick cleaning and re-wiring, they were ready to be installed in our mudroom bathroom and pantry!

Another one of my favorite fixtures are the pendants that we used in the downstairs bar.  I ended up picking up some vintage fixtures from the Midwest on Ebay last year for $17 each!  Score!!  My parents helped me strip three of them down to the original brass.  They were painted over and with years of dirty and grime, it took some real elbow grease to make them shine.  Each one took about 2 ½ hours to strip and I was so thankful that my parents helped me with it, because it would have taken me three times as long without them!

Exterior Painting

Finally the exterior of the house was also painted this week!  Such a transformation to see it all white – finally!  I’m glad that we waited to paint it until now otherwise it would already be showing the dirt from the construction – but boy was I getting tired of seeing the yellowish color of the siding and trim.  Now that it’s all white (Sherwin Williams’ Pure White) it looks even better!  It took me a while to decide on the white – I was originally going to use Benjamin Moore’s Simply White but in the end looked a little to creamy.  I think SW’s Pure White ended up being the best one since it looks like a true white, but not “bright” or blue like some of the others that I tested.

2016-04-20 12.58.32

The exterior painting on the house started this week. I’m loving the way it’s turning out!

We also painted samples for the door color and taped them up there to see how they looked with the overall house color.  Originally I was thinking of painting it black – there’s a lot of white houses with black doors and they look phenomenal.  But I wanted to be able to see the door hardware, and since all of the exterior hardware is oil rubbed bronze, that meant that I’d need a chrome front door handle to be able to see it against a black door.  My friend Sarah was surprised that I was thinking of a black door (since she has one and hates it) and quickly turned me in the direction of having a gray door.  Sarah helped me tons on this one and flipped through her SW color deck and suggested a handful of grays that may work well.  After a quick trip to SW to see which ones she was thinking of, I chose three sample pots.  And after being up on the house, ended up choosing SW’s Serious Gray – it’s the top one in the photo.  I can’t wait to see what it looks like once the door is truly painted, but I think it’s the perfect one – and that the oil rubbed bronze hardware will look phenomenal with it!

2016-04-24 12.24.33

We narrowed it down to three front door color choices – and ended up choosing the top one – Sherwin Williams Serious Gray

Week 45: Painting…some more trim

Painting, painting, painting…

Again just more trim painting this week.  It seems to go so slow because they have to tape everything off in order to paint it.  And there’s so much trim around the house, especially because of all of the transom windows (interior & exterior).  So that adds a lot of time to what normally wouldn’t take as long.

Besides just the trim painting, I also had to choose colors for the boys’ rooms.  I ended up mixing a couple colors together to create my own dark blue color for Cameron’s room and then I had Sherwin Williams color match it.  For Spencer’s room I had a hard time choosing.  The blue I had purchased from Restoration Hardware ended up having too much purple in it.  So then I mixed one of my own and I still didn’t like it.  Finally, I grabbed some color chips and settled on Sherwin Williams’ Languid Blue.


Week 44: Painting & Bar Top

This week was Spring Break for Cameron and I was out of town for a work event so I wasn’t at the house too much.  The painting continues to be the main star of the show for the house progress.  They finished painting the trimwork for the basement and have moved on to painting the trim upstairs.  My absolute favorite part of the house that was painted this week is the fireplace – hands down.  It turned out fantastic and seeing it all in white really make such a difference.  We’re both thrilled!

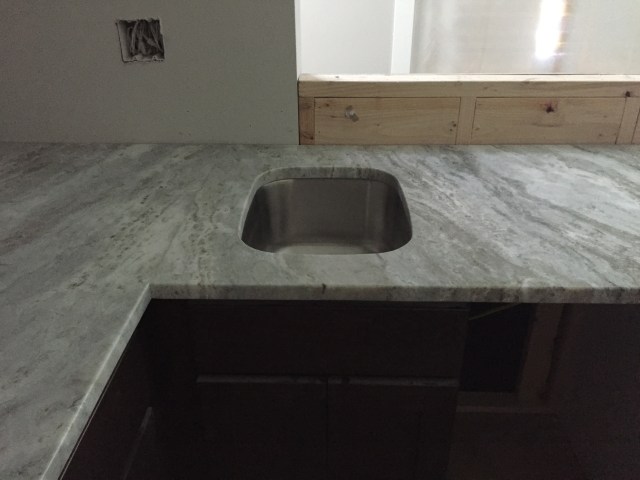
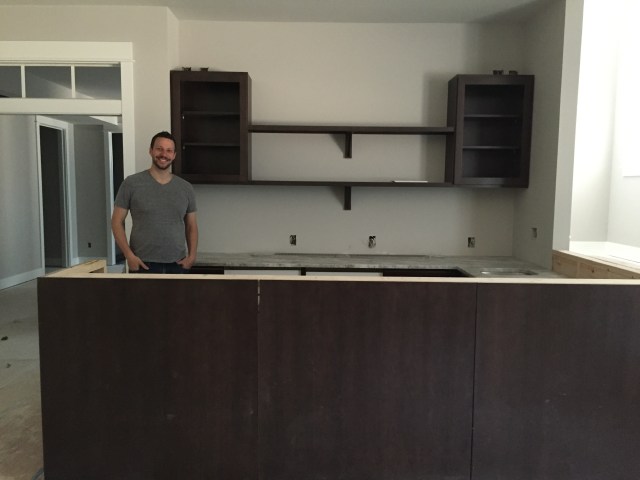
The other major thing to see progress is the bar countertop downstairs.  We selected fantasy brown quartzite with a leathered finish.  It has a great texture and just the right mix of gray and brown to tie into the java cabinets.  For the backwall of the bar, we had a custom bar drain made – at 5’6″ long, it’s really a focal point.  We won’t have the taps installed right away, but since the countertop needed a cut-out for the drain, we had to have that created sooner rather than later.  The drain will connect into the sink drain, so it’ll be super easy to clean.  And the sink was installed as well.  It’s coming together – Joel couldn’t be happier!


Week 43: Tile, Slabs, Drainfield & Downstairs Painting

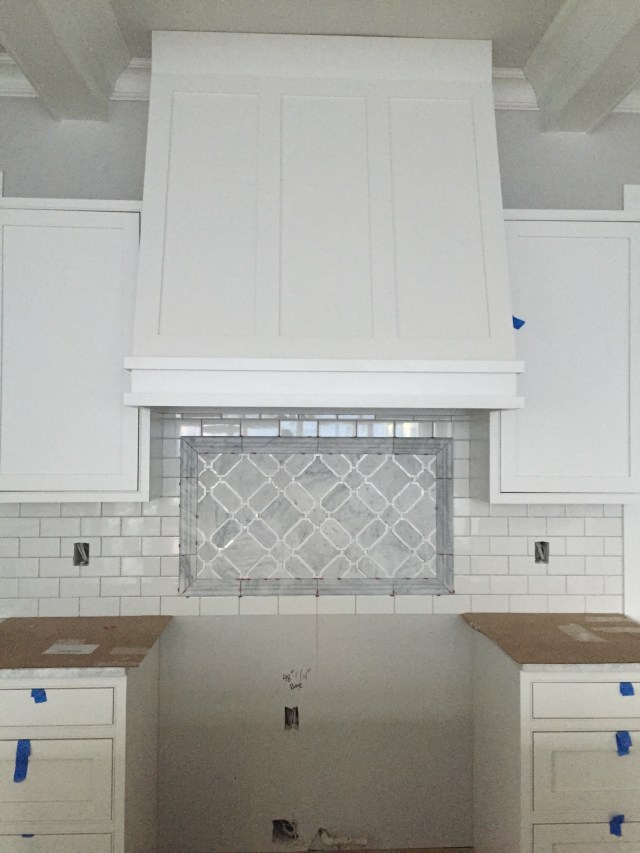
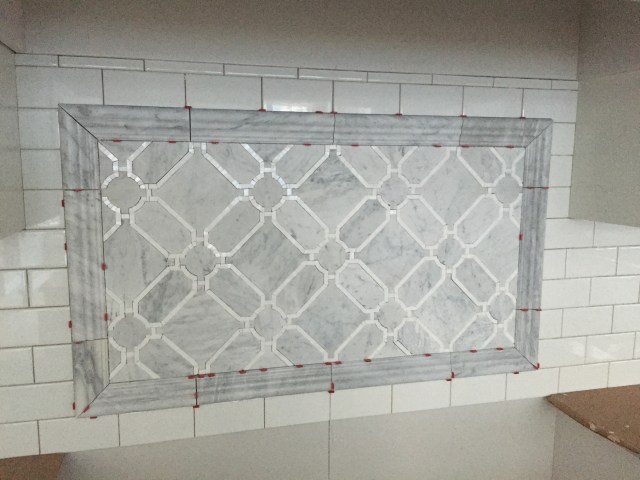
My absolute favorite tile was installed this week behind the range in the kitchen.  The tile installer did such a fantastic job installing the tile too…it looks fantastic!  This tile is Mosaique Surface’s Artemis Cold – a pattern of honed cararra velato and polished white thassos.  We’re still waiting on some trim tile to border the subway tile in other parts of the kitchen, so until that arrives, it won’t be grouted.

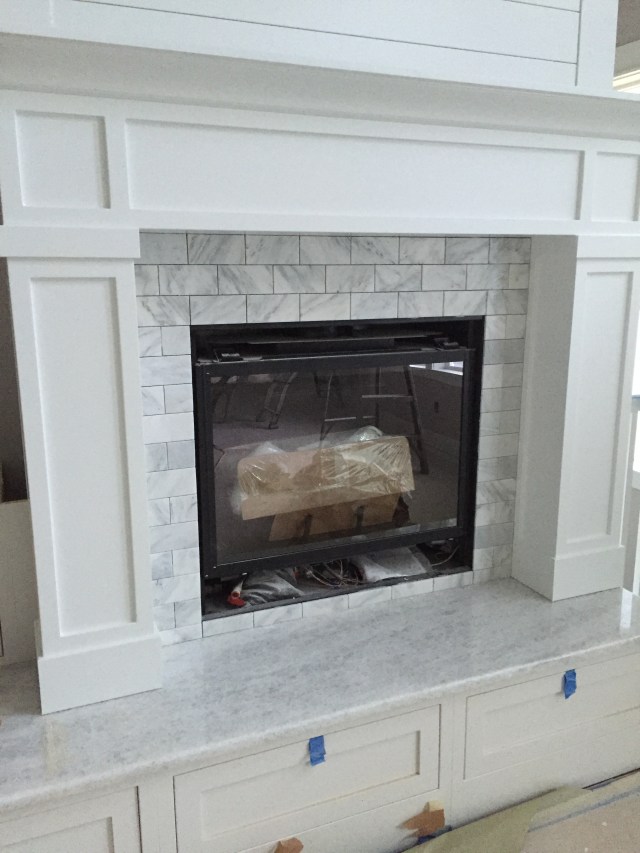
The fireplace tile was also installed this week – originally I was contemplating changing this tile to something different, but after  realizing that we can’t return the tile and whatever I would order otherwise would take a few weeks, I quickly decided against it.  I honestly have no idea how this looks with the slabs on the fireplace hearth because they’ve been covered with cardboard.  Hopefully once grouted and the cardboard is removed they’ll look just fine together though!  If not…I’m sure Joel will let me redo it 😉

2016-03-29 18.37.12

The fireplace tile was installed this week.

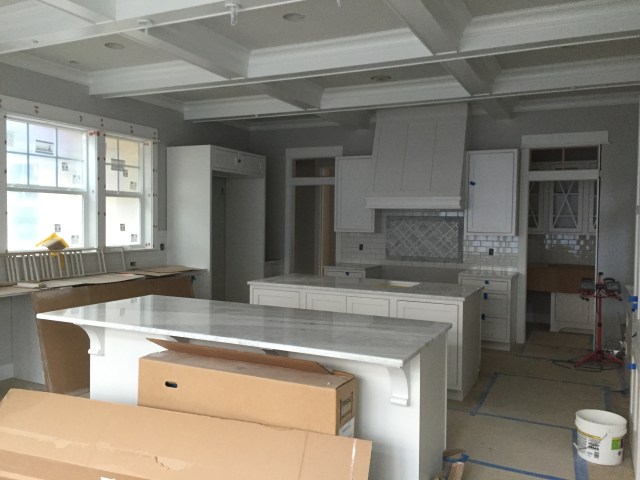
The remaining slabs were installed in the kitchen this week as well.  I was actually out at the house dropping of the staircase handrail and they were out there installing the slabs.  It was pretty crazy to see how they lift those giant slabs and get them in place.  Definitely takes some strong guys and a couple of gripper things.  I was glad I was there too – I was able to choose the direction that the veining was running in the slabs.  They look SO GOOD too!!!  We used the same absolute white quartzite that we selected for the other areas of the kitchen.

Outside we also had progress…the septic drainfield was installed this week and once inspected by the county they can backfill it all and we can begin on the final grading of the yard.

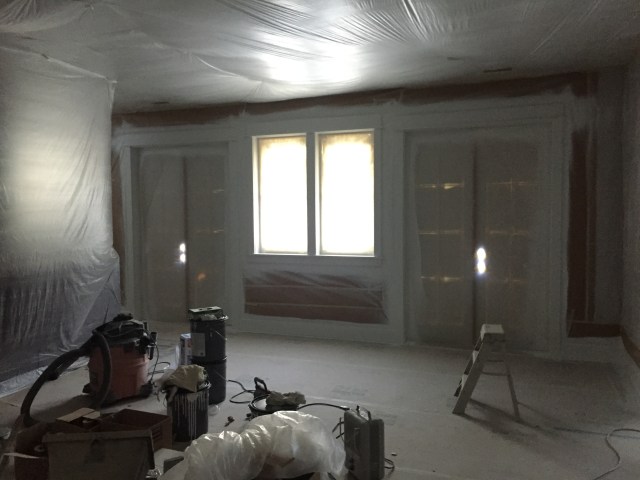
Back in the house, all of the trim in the downstairs was also painted this week.  The lower level is completely covered in paper and plastic masking everything off.  Walls, ceilings, floors, it’s crazy.

Week 42: Tile, Trimwork, Stairs, Septic, and Rental House Issues

Rental House

This week seems to have gone by so quickly!   One of the major things that happened this week is that we received an email from the property manager from the house we’re renting a couple miles from the build.  He said that the owners of the house want to move back into the house and we need to move out at the END OF APRIL!!!  Matt was anticipating for the house to be finished at the END OF MAY!!  Seriously?  How does this happen to us?  Our 10-month lease ended in January and since then our contract switched over to month-to-month leasing.  And the contract states that we or the owner can terminate the lease with a 20 day notice.  We actually met the owner about 6 months ago when they were visiting from China getting baby gear out of their garage.  Back then he said that we should stay and rent the house for years!  And in January when I told the property manager that we were extending our stay past the 10-month term he said to stay until August.  Now they want to move back from China though?  Something must have changed with his Microsoft job.  Ugh.  And the property manager has no idea either – this totally blindsided him as well.

So now for the first time in the entire build, schedule matters.  Prior to this, Joel and I honestly didn’t care if it took longer to build, we just wanted it done right.  I mean, what’s a couple extra months in the end if it turns out great?  The boys have made some good friends in the neighborhood we’re renting in and it’s so close to the build, that it’s convenient to pop over and check things out.  Now getting done with the build at the end of May when we need to move out at the end of April seems WAY too long though.  Where are we going to live for those 4 weeks?!?  So I did what any person in my situation would do.  Ask our builder Matt, “what’s really going to be left to do after the last week of April?”  I explained our situation and wanted to see if there was any way we could speed things up a little and maybe move in sooner than later.  He took a couple days and was able to push a few things…and now we’ll be moving into the new house the first week of May!  Can you believe that?!?  The first week of May!!!  That means that we’re only between homes for a week.  A week, I can live with.  Can you say, “hello mom & dad?”  They live about 45 minutes away from us without traffic so the commute just to get the boys to school and us to work is going to be horrific.  But the boys love staying there and it’ll be so nice just to move with only having to pack our clothes.  The rest of our stuff can move into the garage of the new house until we get there a week later to unpack.  Although Matt will have the inside of the house finished, we’re not expecting the outside to be completed – we’ll likely still need the deck, driveway and landscaping.  The inside is good enough for me though!

For our final hail mary, we’re still trying to see if we can extend our lease another week so we can move straight from the rental into the new house, but we haven’t heard back from the owner and they’re not returning the emails that the property manager has sent (which has been 4 of them now).  Cross our fingers 😉  At least mom & dad’s is a good back up plan.


New House

Besides the rental house issues, things have been moving along at the house quite well.  There’s so many little details that took place in the house this week. The tile and hardwoods have been completed and that’s all of the flooring until the carpet is scheduled to be installed in the last week of April (just before we move in!).  The stairs were even installed this week and they look fantastic.  It took a few different tries to get the right stain color for the treads, but I think they turned out great.  On Thursday evening, Cameron and I went to check out the house and Matt was there covering the stairs to protect them from all the workers’…and we ended up helping and covering them for him.  Um, don’t say that I never lifted a finger to build the house, ha!

The trim sub consultant keeps on trucking – there’s so much that we’re having them do for us.  Besides installing all of the door moulding and baseboards throughout the house, there were two major accomplishments this week – creating the fireplace surround and starting on the interior transom windows.  First things first the fireplace looks amazing!  Monday morning Matt and I walked through what I wanted the design of the fireplace to be and he made it all happen!  I love how it sits on top of the bench/hearth we have, and that the mantle is so deep.  In our old house there would barely be enough room for Christmas stockings, let alone any other decor.  This one is sure to fit whatever I want to decorate with!

On Saturday, Joel and I went out to check out the progress and one of the trim guys was there working on the interior transom windows.  We weren’t quite sure if we were going to order these or have them built on-site, and now that we went with the latter, I couldn’t have imagined the ordered ones turning out so well.  The first side of the transoms have been installed, then they’ll need to be painted on both sides and glass added.  Then the other side of the transom trim can be added.  It looks so good for them finally to be filled in with moulding though!  All these little details are really making the house come together.

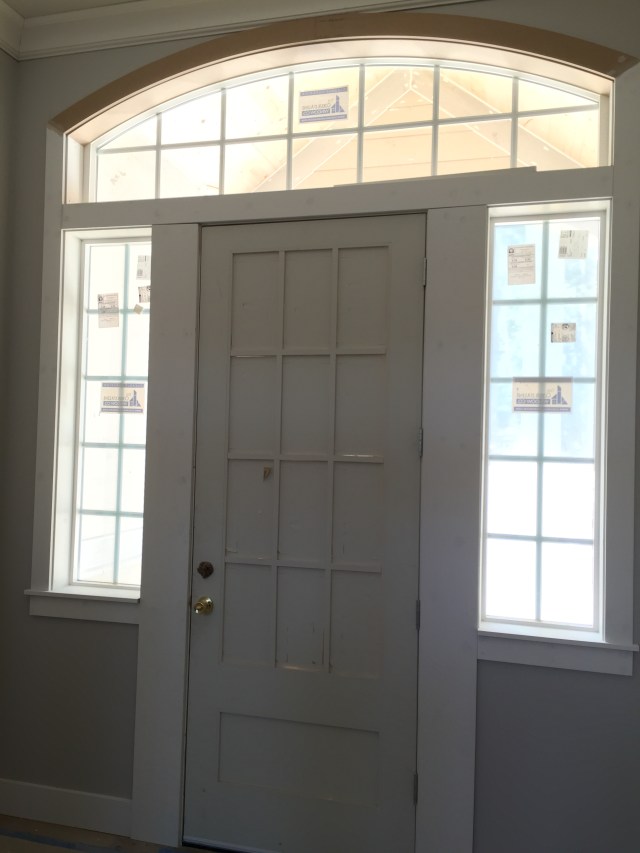
And did you notice that the oval windows in the great room in the last picture now have trim as well?  These were measured for and custom made by a different company and then installed this week.  The same goes true for the arched windows in the dining room and in the entry.

Besides all of the trimwork, they also added some more detail on the cabinetry.  Matt pointed out that if we added crown all the way around the kitchen hood (like I wanted) that the crown would basically touch the other pieces of crown in the coiffured ceiling.  So that’s out of the question…so that’s a bummer.  But I still think it looks good as is without it – definitely my favorite feature in the kitchen, and it’s pretty fun that I got to design it!  Feet were also added to a few cabinets throughout the house – which I also had custom designed based on some pictures of kitchens that I liked on Houzz.

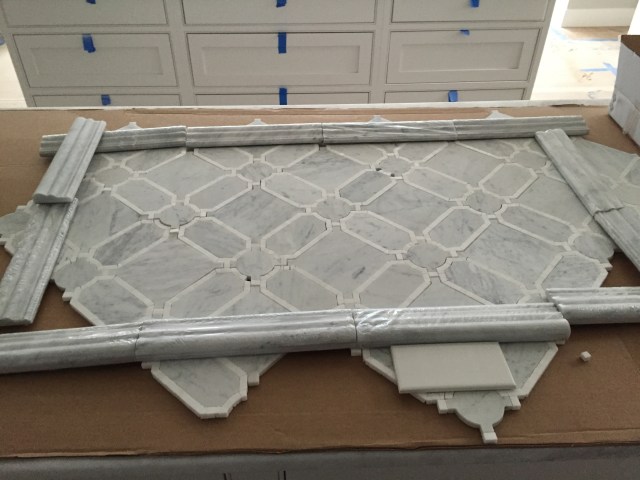
Tile work also continued this week.  Although choosing and shopping for tile was my absolute least favorite thing to do for the entire build, I love seeing it all installed.  Most of our selections were pretty basic, but even seeing white subway tile instead of drywall is fun.  On top of that, the tile my mom and I chose for the backsplash behind the range arrived and I brought that out to the house.  On Wednesday, I met the tiling sub onsite to go through the layout with him.  Originally, we were going to have a different border that had a dark gray bardglio marble liner and then a white chair rail that matches the subway tile backsplash.  Unfortunately though, the bardiglio came in and looked too blue to really coordinate with the beautiful mosaic tile.  So we ended up using a carrara marble chair rail.  We needed it this week though so there wasn’t any time to special order in the profile of the moulding that I wanted.  Luckily, good ol’ Home Depot carries one that will work perfectly.  Not so perfectly is that you have to find the marble in gray and white.  And when you see them at the stores, about 80% of them look white with brown veining.  Ick.  I’m not kidding you – to find the 12 pieces that we needed to frame the backsplash, my mom and I went to 6 different Home Depot stores!  Unreal.  But now that we have them,  I love them and totally worth the drive time to find them. Plus at $6 each, they were about 7 times cheaper than the ones that I wanted to order in!  Score!!!  I hope it gets installed back behind the range soon – I can’t wait to see it on the wall!

The painters were also in the house this week.  They’ve set up a Dexter kill room, er, um, a “spray booth” in the downstairs storage room .  That room was ALWAYS creepy with the concrete floors and unfinished walls and ceilings but this tops it.  I can’t wait for electrical finishes to finally put some lights in this space.  It’s beyond creepy and way too dark in there now.

2016-03-26 13.33.59

The painters have set up a spray booth in the storage room downstairs where they can paint doors and whatever else they have. I’m steering clear of this space though until they take down all of the plastic. A little too Dexter-esque for my liking.

And one of my favorite doors was also installed this week!  We have a dutch pocket door between the mudroom and the hallway.  This way we can just pull out the bottom half of the door to keep our dog Bella in the mudroom during the day.  No baby gates needed here!  Isn’t it fantastic?  It’ll be so nice instead of shutting the entire door on her while we’re gone during the day – I hate doing that now in our rental house.

Also, the septic installation began this week.  After getting the septic notice on the title recorded with King County and submitted to the health department, the septic stub-out was released and they were ready to do the install right away.  By Saturday, they had the tank set in the ground.  While Joel and I checked out the progress inside the house, we laid out a blanket and the boys ate their Subway lunch by having a picnic on top of the rock pile.  Little do they know that that’ll eventually be part of the septic drainfield!

Week 41: Private Well Update

Our lot is located on a private drive which doesn’t have any public water service running to it.  Because of that everyone in our mini-neighborhood has their own private well.  We’ve never owned (or lived in) a house with a private well, but my aunt and cousin just built homes and they each needed a well…so I guess it’s common.  It’s a pretty straight forward process…hire a driller, hit water, send it to the house.  Or so I thought.

After drilling you need to get the water tested for bacteria…yep, sounds like a good idea – don’t want to be drinking ick.  And with that, they also test for nitrates and arsenic.  We paid extra and ran a complete IOC (inorganic chemical) test to show us what exactly was in the water which tested for everything under the sun.  Well, the test went really well, except that we had an elevated level of arsenic.  Arsenic is a natural element which comes from rocks.  And on the eastside where we’re building it’s pretty prevalent.  In fact, all of the homes on our street have arsenic in their well water.  Shouldn’t be a big deal though, just thousands of dollars later and you can have a full house water filtration system installed.

Over the past couple of months we’ve been dealing with all of this.  First we hired Carl Garrison from Garrison Engineering to design the water filtration system for us.  It took a couple of weeks, and after consulting with him on the system maintenance that we were willing to do, we had the filtration system designed.  He was great to work with and I would definitely recommend hiring him if you’re in the need of any filtration system.

Pages from Well Arsenic Treatment Design - Garrison Engineering 12-2015

Water filtration design for our well water by Carl Garrison.

Then we hired Meadow Lake Water Treatment to install the system that Carl designed.  It took a while to get all of the parts and pieces ordered and arrived, but after a few weeks all of it showed up and they installed the system without any hitches.  Since then we had the water retested and there’s no trace of any arsenic.  SUCCESS!!!

Now that we have satisfactory test results, we can finally install our septic system.  That’ll be the final thing we need to do and then we can finish up our site grading.


Here’s the crazy thing though…if we didn’t apply to drill our well before November 15th, 2015 we wouldn’t be able to use our well water!!  King County has recently changed the way they allow wells to be dug.  Before you can even get a building permit, the well must be dug (they give you 6 months to do so) and it needs to have satisfactory lab results…make sense.  But, if the well comes up with an elevated arsenic level greater than 0.1mg/l (10 parts per billion)…YOU CAN’T USE IT!  They won’t even let you install a treatment system any more.  Isn’t that crazy?  You can fully treat the water and make it 100% safe to drink but they won’t allow you to do that any longer.

King County came out with an industry letter (below) which explains the changes “treatment for arsenic level exceedances will not be an option” and even states in there, “We understand that these changes will have profound impacts for some property owners and developers, especially those in areas of the county with elevated arsenic levels.”  That’s so crazy!  If we wouldn’t have put our application in prior to November 15th, we wouldn’t have been able to build because of the elevated arsenic levels and we would have been out the money we paid for the lot.  It would have been undevelopable until public water is run in our street (which may never happen).  Alternatively, I guess you could keep drilling deeper and deeper until you found an aquifer without the arsenic…but that’s such a risky guessing game.  We drilled down to 350′ deep to a confined aquifer – but what if you never find another aquifer?  Then you’ve wasted tens of thousands of dollars drilling for nothing.

If any of you are interested in purchasing land in King County – and if it doesn’t have public water readily available, I would definitely make the seller drill a well and have it tested before purchasing the land.  Otherwise, who knows if you can even build on it!

Week 41: Countertops & Tile

This week there’s been a lot happening at the house this week including continuing on the trim work – there’s tons to do still including wrapping all of the doorways and baseboards.  And the painters were also there painting doors and other trimwork.  But I barely even took pictures of those since the best thing about this week was all of the countertops and tile that were installed!  The absolute white quartzite was installed throughout the main level and it looks ‘absolute’ly amazing!

So now that the fireplace hearth is installed, and I’m not 100% sure about the tile that my mom and I picked out for the fireplace surround.  Originally we picked out 3″x6″ tiles from Walker Zanger’s Rue Pierre Antique Gris Marble.  Now I’m not so sure about it.  It’s definitely similar colors as the absolute white quartzite, but  has more of a striped white/gray pattern to it.  I’m wondering if maybe something more consistent in color like cararra marble will look/flow better.  For the record, my mom actually liked the carrara better originally.  It’s pretty similar to the hearth quartzite though…too similar?  Ah dilemmas!

The laundry room floor was installed this week (still missing the grout), and so were the counters!  We went with MSI’s Sparkling White Quartz which has some green glass and mirror flecks in it for the counters and kept it simple with Daltile’s Octagon Dot floor tile in white.  Once the white grout is installed it will tone down the patterning in the floor for sure!
The flooring in the mudroom was also installed this week – actually weekend!  They were out there installing it on Saturday when I was there for a visit.  We went with 12″ x 24″ Florida Tile’s “Mingle” in the Cool Summer color set in a 1/3″ stepped offset pattern.  The vanity, sink and countertops were also delivered from Restoration Hardware this week for the mudroom bathroom.  I chose the Cartwright Powder Room Vanity with the Italian Pietra Grigio Marble top.

And downstairs, lots of things happened this week too!  The hardwood flooring was installed, although by the week’s end it was covered with a protective layer of Ram Board which I think will stay on it until we’re ready for cleaning and moving in.  The new narrower sink base arrived for the bar and looks fantastic!  The sink barely fits in it, yikes!  Hopefully it’ll work still though.

The boys bathroom flooring was also grouted.  Although one piece of tile needs to be replaced – someone dropped a tool on it (probably when installing the door) and the tile broke.  Once that’s done the floor (and grout) will be complete.  The counter tops and sinks were also installed in the boys’ and guest bathrooms.  The boys’ countertops I selected are a gray/blue color – Wilsonart’s Quartz in Amalfi Coast and the counters in the guest bath is Pental Quartz’ Grey Savoie.

At the beginning of the week, the Skyline Tile and Marble were out measuring for the bar downstairs and for the farm sink placement in the kitchen.  Then I went to their shop in the afternoon on Monday to choose where I wanted the counters to be placed on the slabs.  We ended up having to purchase two slabs since the bar is in a U-shape and we needed the graining of the counters to all be in the same direction.  There’s so much left over though!  We may end up using it for a backsplash.  We’ll see how much that’ll cost!  My mom and I chose these slabs back in October at META Marble and Granite.  They’re fantasy brown quartzite with a leathered/textured finish.  With the gray & brown that they have, they’re going to look great with the cabinetry and room color.

And finally, there has been some sunny storms over the past couple of weeks…check out that rainbow!

2016-03-06 16.00.56

Just a touch of rainbow to brighten up the sunny and rainy day!


Week 40: Hardwood, Doors, Cabinetry & Countertops

This week the absolute biggest change has been the installation of the hardwood floors.  They were able to install the entire first floor and they look fantastic!  We ended up choosing a hand scraped and wire brushed 8″ European Oak in a natural finish by Plank.  We originally wanted a white oak finished on-site but because the basement is a slab on grade they didn’t recommend us installing solid hardwoods down there. I didn’t want the upstairs hardwood to be different from the downstairs so we ended up choosing an engineered hardwood that could be installed both upstairs and downstairs.  It took us quite a while to pick out the flooring – the colors and finishes really vary brand to brand and so does the warranties.  The Plank brand had the wide planks that Joel wanted, the color I wanted, and with more than 80% of the boards being at least 6′ long (Some brands have little lengths of boards that makes the floors look really choppy).  I really like that the color was a warm almost neutral color that didn’t have a pink or white tint (like some of the others we saw), and I really like that the boards have some knots to add character.  The  finish has a 50 year warranty and a lifetime structural warranty – they were a little pricier, but it was the warranty that sealed the deal for us.  Some brands we saw only had a 2 year finish warranty…no thanks!

More of the cabinetry and moulding were installed this week as well.  My favorite cabinet in the entire house has to be the hood above the range.  The cabinet company (Canyon Creek) didn’t have anything that I liked so I ended up being able to custom design the exact hood that I wanted.  I absolutely love it.  And it will look even better once the crown moulding is installed around the top of the hood (and on top of the cabinets).  The butler’s pantry was installed too – love the upper cabinets with the “X” design!  The glass still needs to be added, but I think they look great even now.  And I haven’t decided yet if we’ll install glass shelving in the uppers too…my mom and aunt caution me against glass shelves because of the dust that will show with all of the natural light in the house.  Downstairs, we ended up deciding to reduce the width of Joel’s bar by 6″, and the backside of the bar was installed with the dark java stained wood.  It’s still missing the trim pieces, but it’s coming along!

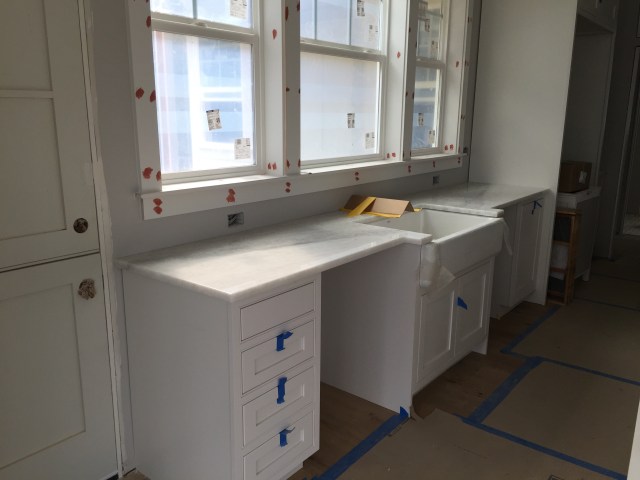
The farmhouse sink was also installed this week.  Choosing this sink took me quite a while.  I knew that I wanted a really wide sink and initially I was looking at the 40″ Rutherford Sink from Shaw Sinks, but it wasn’t available in USA so I would have had to drive up to Canada to pick it up or had it shipped directly from the UK.  The sink was actually considerably cheaper in the UK, so shipping would have been affordable.  The problem was that based on reviews online, some sinks have arrived cracked since they’re fireclay.  And since they’re handmade there could be some undulations in the sink bottom that may not flow all the water to the drain.  The thought of having puddled water in the sink wasn’t that appealing to me.  Also, some people have had cracking in the glazing finish overtime.  With raising two boys (plus Joel) I knew there was no way that I could have a sink that wouldn’t hold up to their abuse.  I ended up choosing the Kohler Whitehaven Apron Sink which is cast iron and during demonstrations people took hammers to it.  I figured – that’s the sink for us!  The only downside is that it doesn’t come in a 40″ size…their largest was 36″.  A small sacrifice for big time durability and availability.  The size works great and fits really well in proportion to the center window above.

2016-03-11 12.54.54

Love the farmhouse sink! Now the countertop company can come back next week and template this countertop for the sink opening.  The feet are still missing on this base cabinet, but don’t the floors look good?!?

A lot of the interior doors were installed as well.  And windows and doorways continue to be wrapped and some of the baseboards have been installed in the rooms that are getting carpet (bedrooms + playroom).  The baseboards are 6″ tall, just like the trim above the doorways.

On Monday, morning I picked up 5 bathroom sinks for the house from Fergusons.  Luckily they open at 6:30 so I was back at the house by 8am when Skyline Tile and Marble came to template for the countertops.  I spent about an hour with them to drop off the sinks as well as go over the overhangs and layouts that I wanted in each room.  Most were pretty standard, but it was good to talk about some of the detailed areas – like the kitchen pass through and the eating space on the kitchen island.

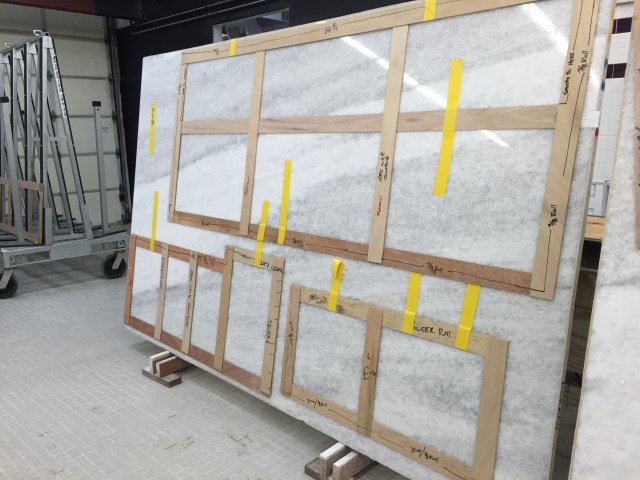
Tuesday I met the Skyline guys at their shop up in Woodinville to layout where I wanted the templates to be placed on each slab.  We started with the bigger most important counter areas (like the kitchen islands) to make sure they had unique areas of white and gray from the slabs and we ended with some of the smaller spaces.  We purchased 4 slabs of the Super White Quartzite.  That gave us enough flexibility for the main areas in the house to get the look that we wanted – soft white and gray without the upkeep of marble.  We ended using the slabs for the kitchen, fireplace hearth, master bath and powder bath.  A couple of the spaces – fireplace and master shower bench weren’t ready for templating so we just left spaces for those to be cut next time they come out to measure.

Week 39: Cabinetry Installed & Tile Progress

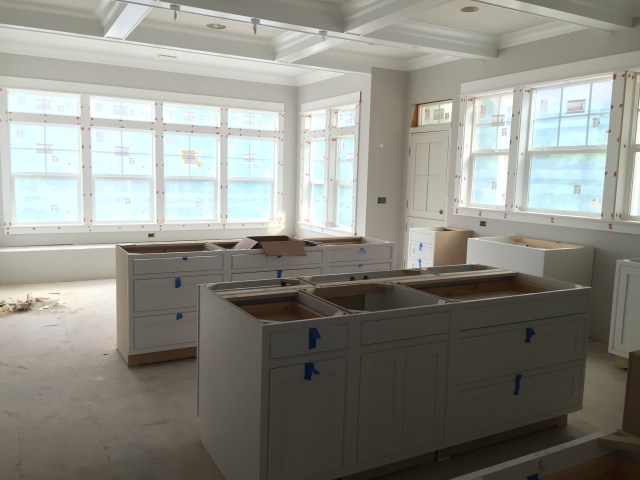
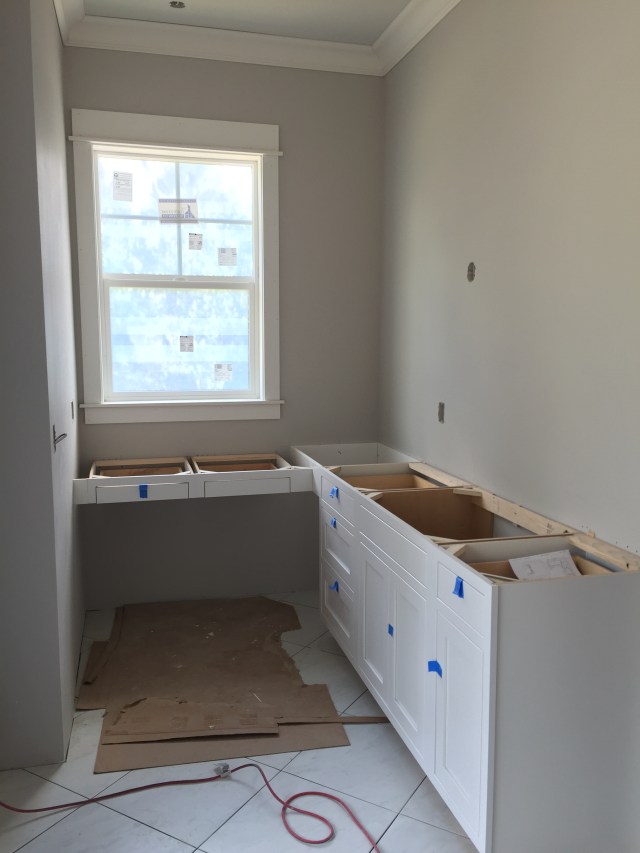
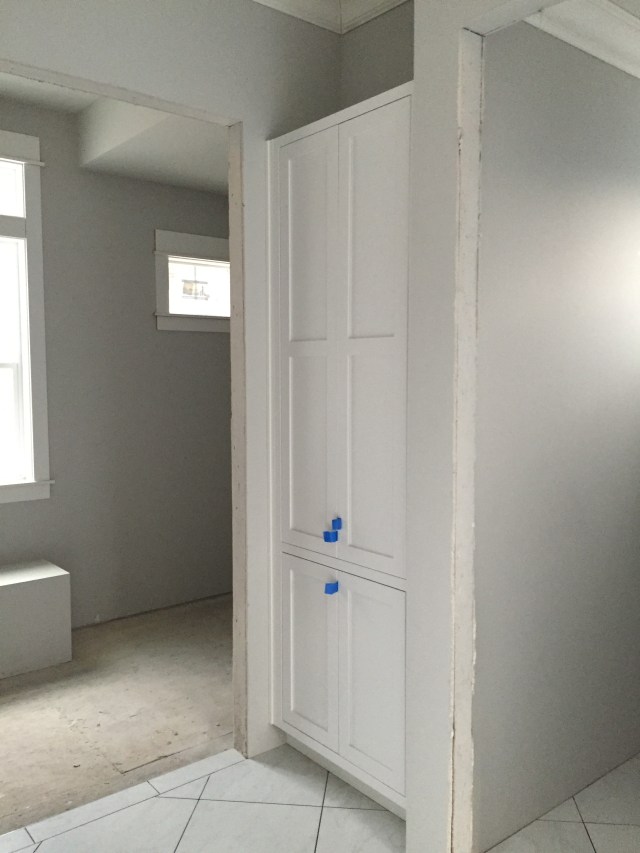
This week there’s been a huge amount of progress because the majority of the cabinets have arrived and they’ve been installed as well!  I can’t believe how fast they all went in…and they look great!  There’s a couple little issues, but nothing major and we are so happy with them.

Besides all of the cabinets being installed, they also fixed the top piece of the window trim and increased the size to 6″…instead of 5″.  It looks so much better and much more in proportion to what would be expected.

2016-03-05 16.18.32

The top trim above the windows has been changed to 6″. I love the way it looks now!

Tile also made progress this week.  The installation of our master bath flooring is complete as well as the tile in the boys’ bath and the guest bath.  It’s all coming together!  None of the grout has been done on any of the tile, but the installation looks fantastic.  Can’t complain one bit…well, maybe about the speed of which they install…but Matt warned me about that before they even started.