We are pretty fortunate when it comes to our septic design. Since our lot previously had an approved building permit, there was also a previously approved septic design. Before we bought our property, during the site feasibility study period in May 2013, we hired Huard Septic Design to confirm that the site passed a preliminary perc test. As it turns out, Dave Huard actually did the septic design on our lot in the past. Fantastic news because he was already ready familiar with our property and the soil conditions.
Back in early August 2014, we contacted Huard Septic Design again to create us a septic design. Really my only concern would be the future landscaping that we’d want to do on the property – terracing the yard, and regrading the back of the property to increase the usability. I spoke with Dave Huard and he said that a small amount of regrading is allowed in the septic drainfield area, but not a whole lot. With that information, I revamped our backyard grading and gave him the grading plan below (yellow area being where I’d want them to locate the septic system).

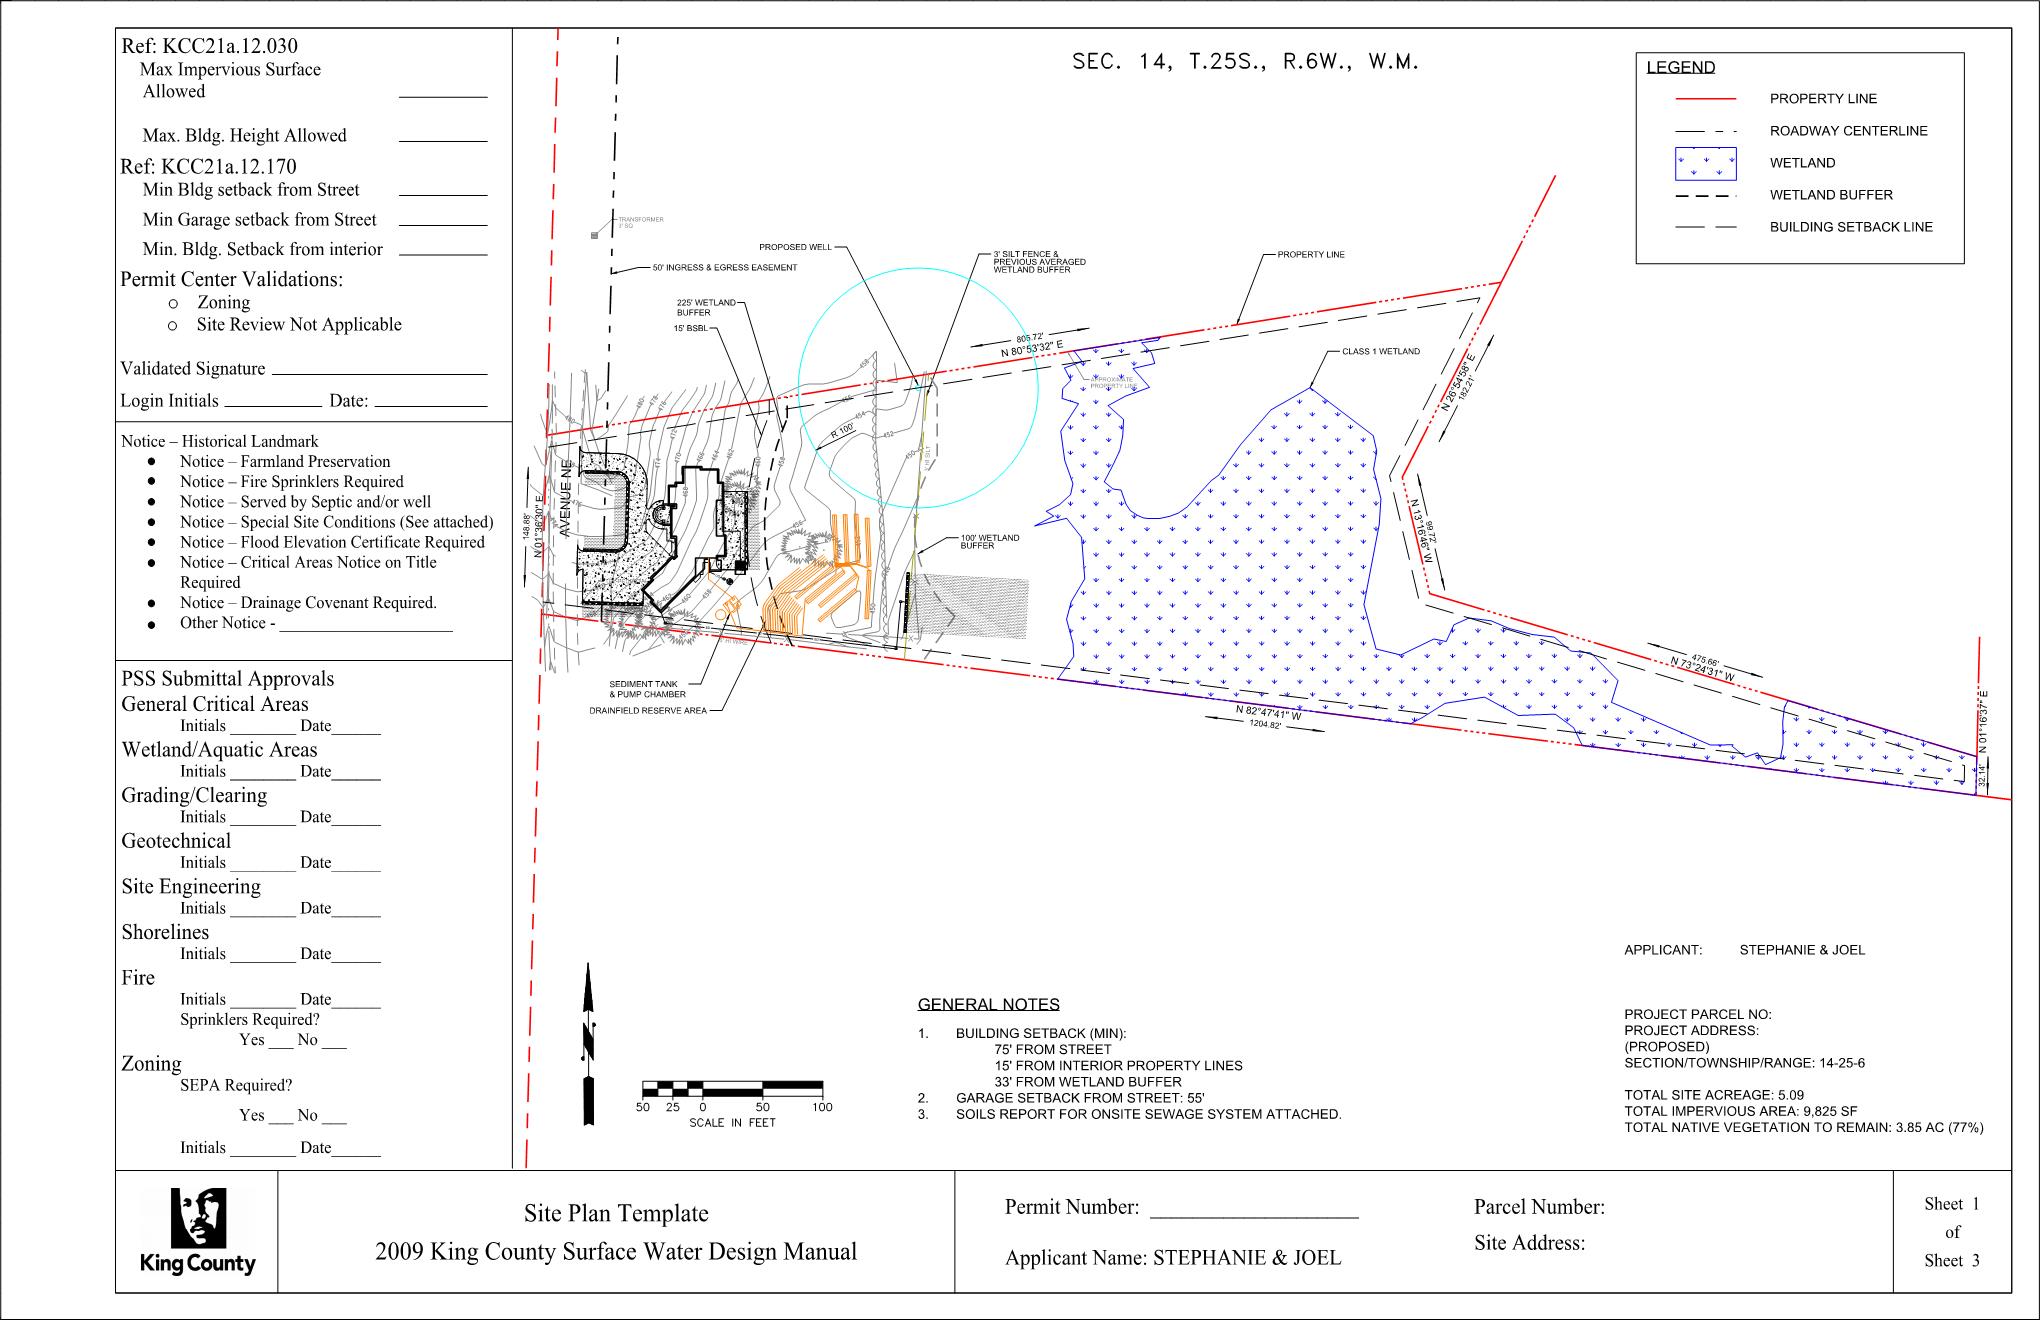
Highlighted in yellow is the area that I graded for the septic drainfield.
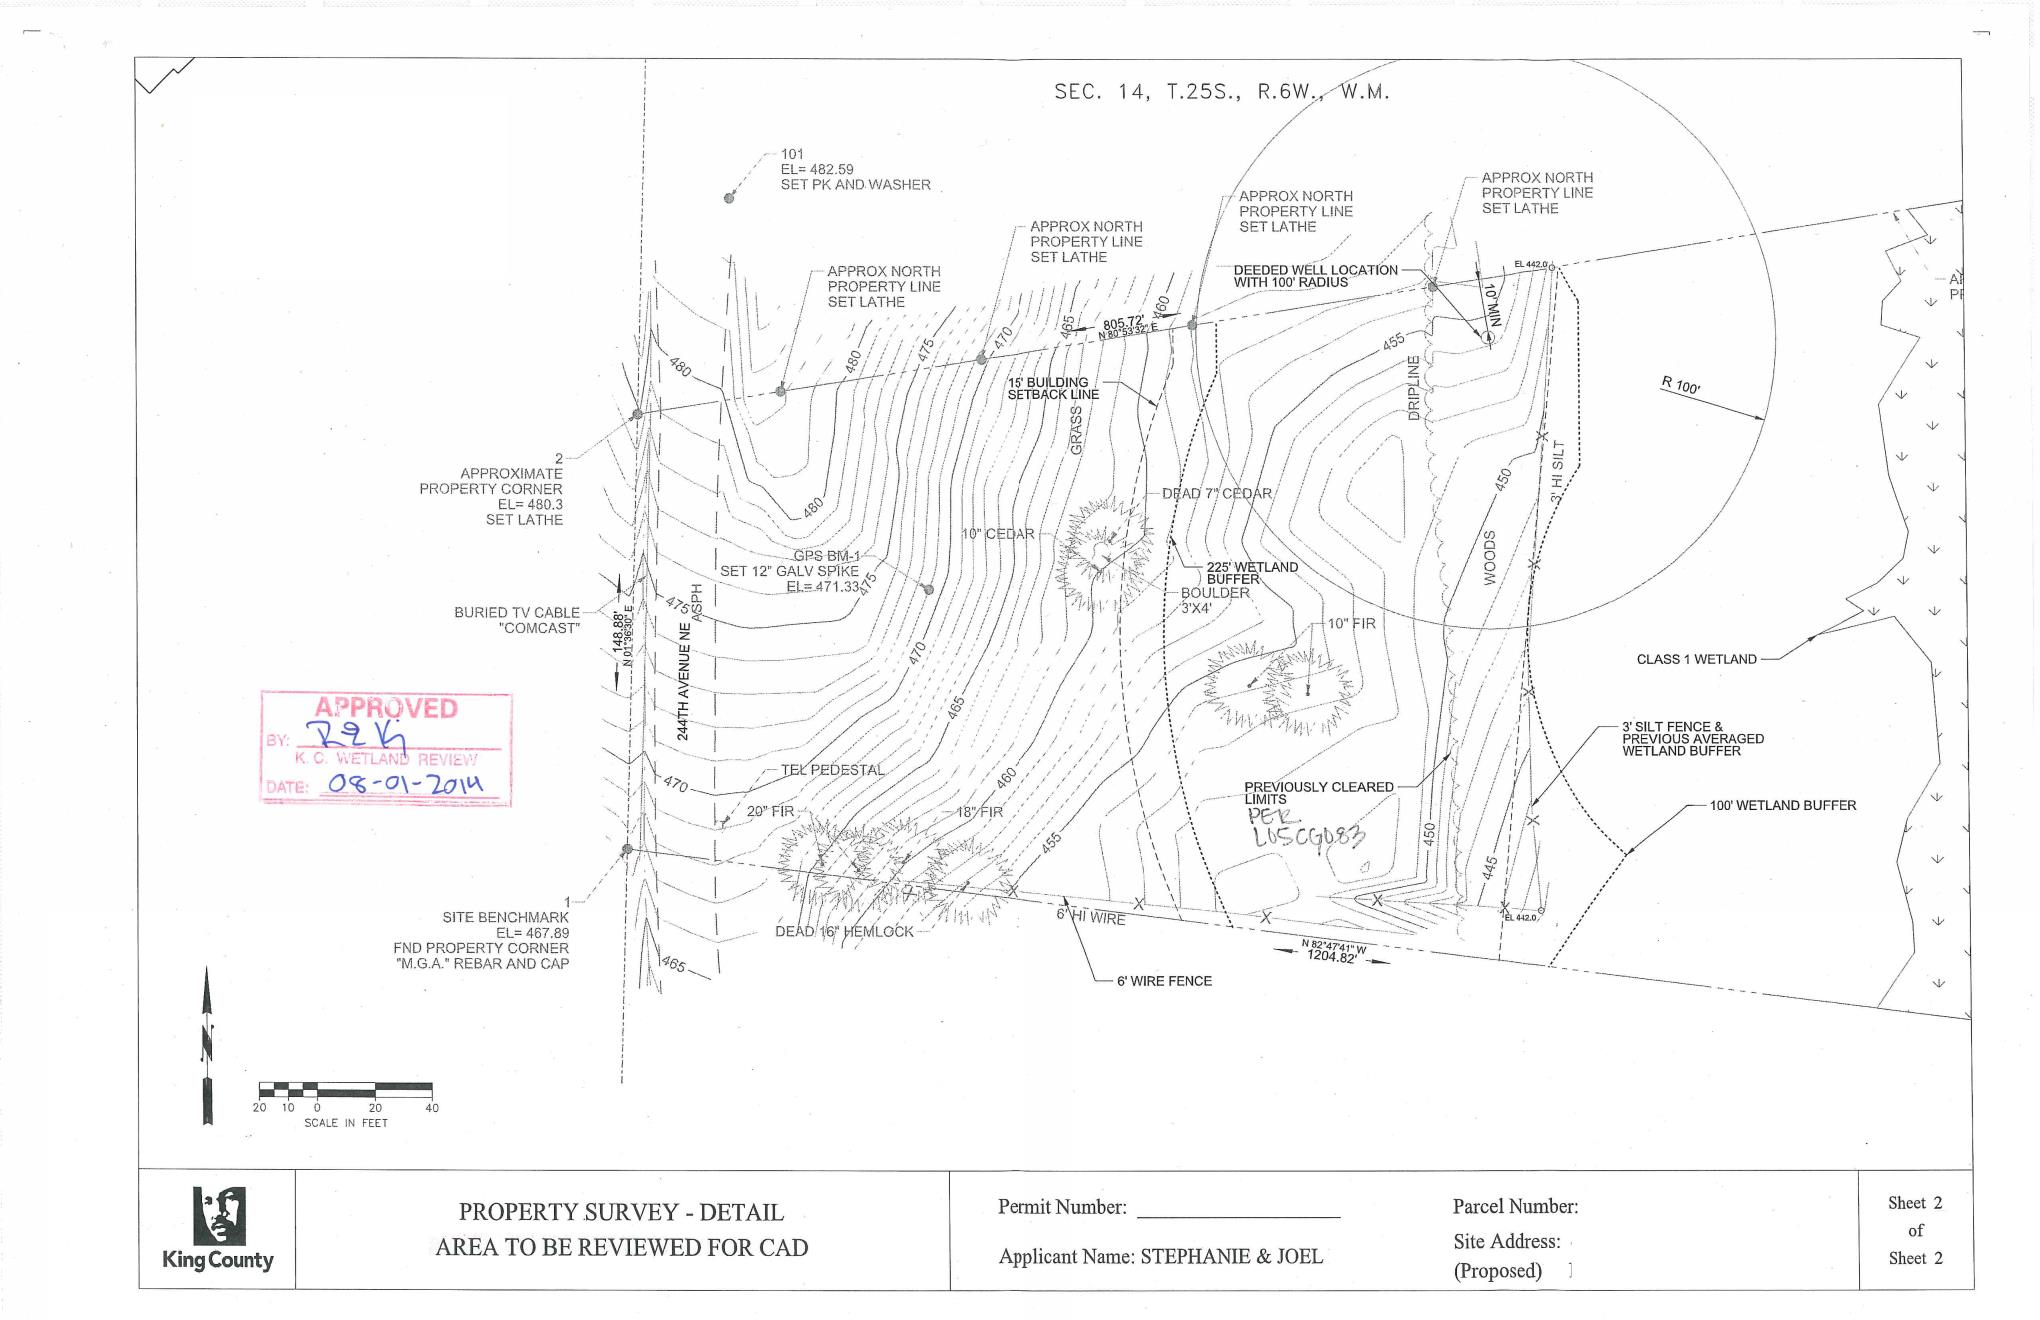
After initial research to gather existing data in his office, Dave, from Huard Septic Design went to the property to stake the proposed well location and dig six soil test holes on August 27th, 2014. Although we already knew the soil characteristics from our preliminary perc test last year, the holes needed to be dug (and well staked) for the County’s inspection. For you geotechs out there, the soil logs all came in with approximately the same information:
0-5” sod/top soil
5-30” brown sandy loam with roots (type 4)
30”-54” gray gravely loamy sand with cobble (type 4)
54” compacted
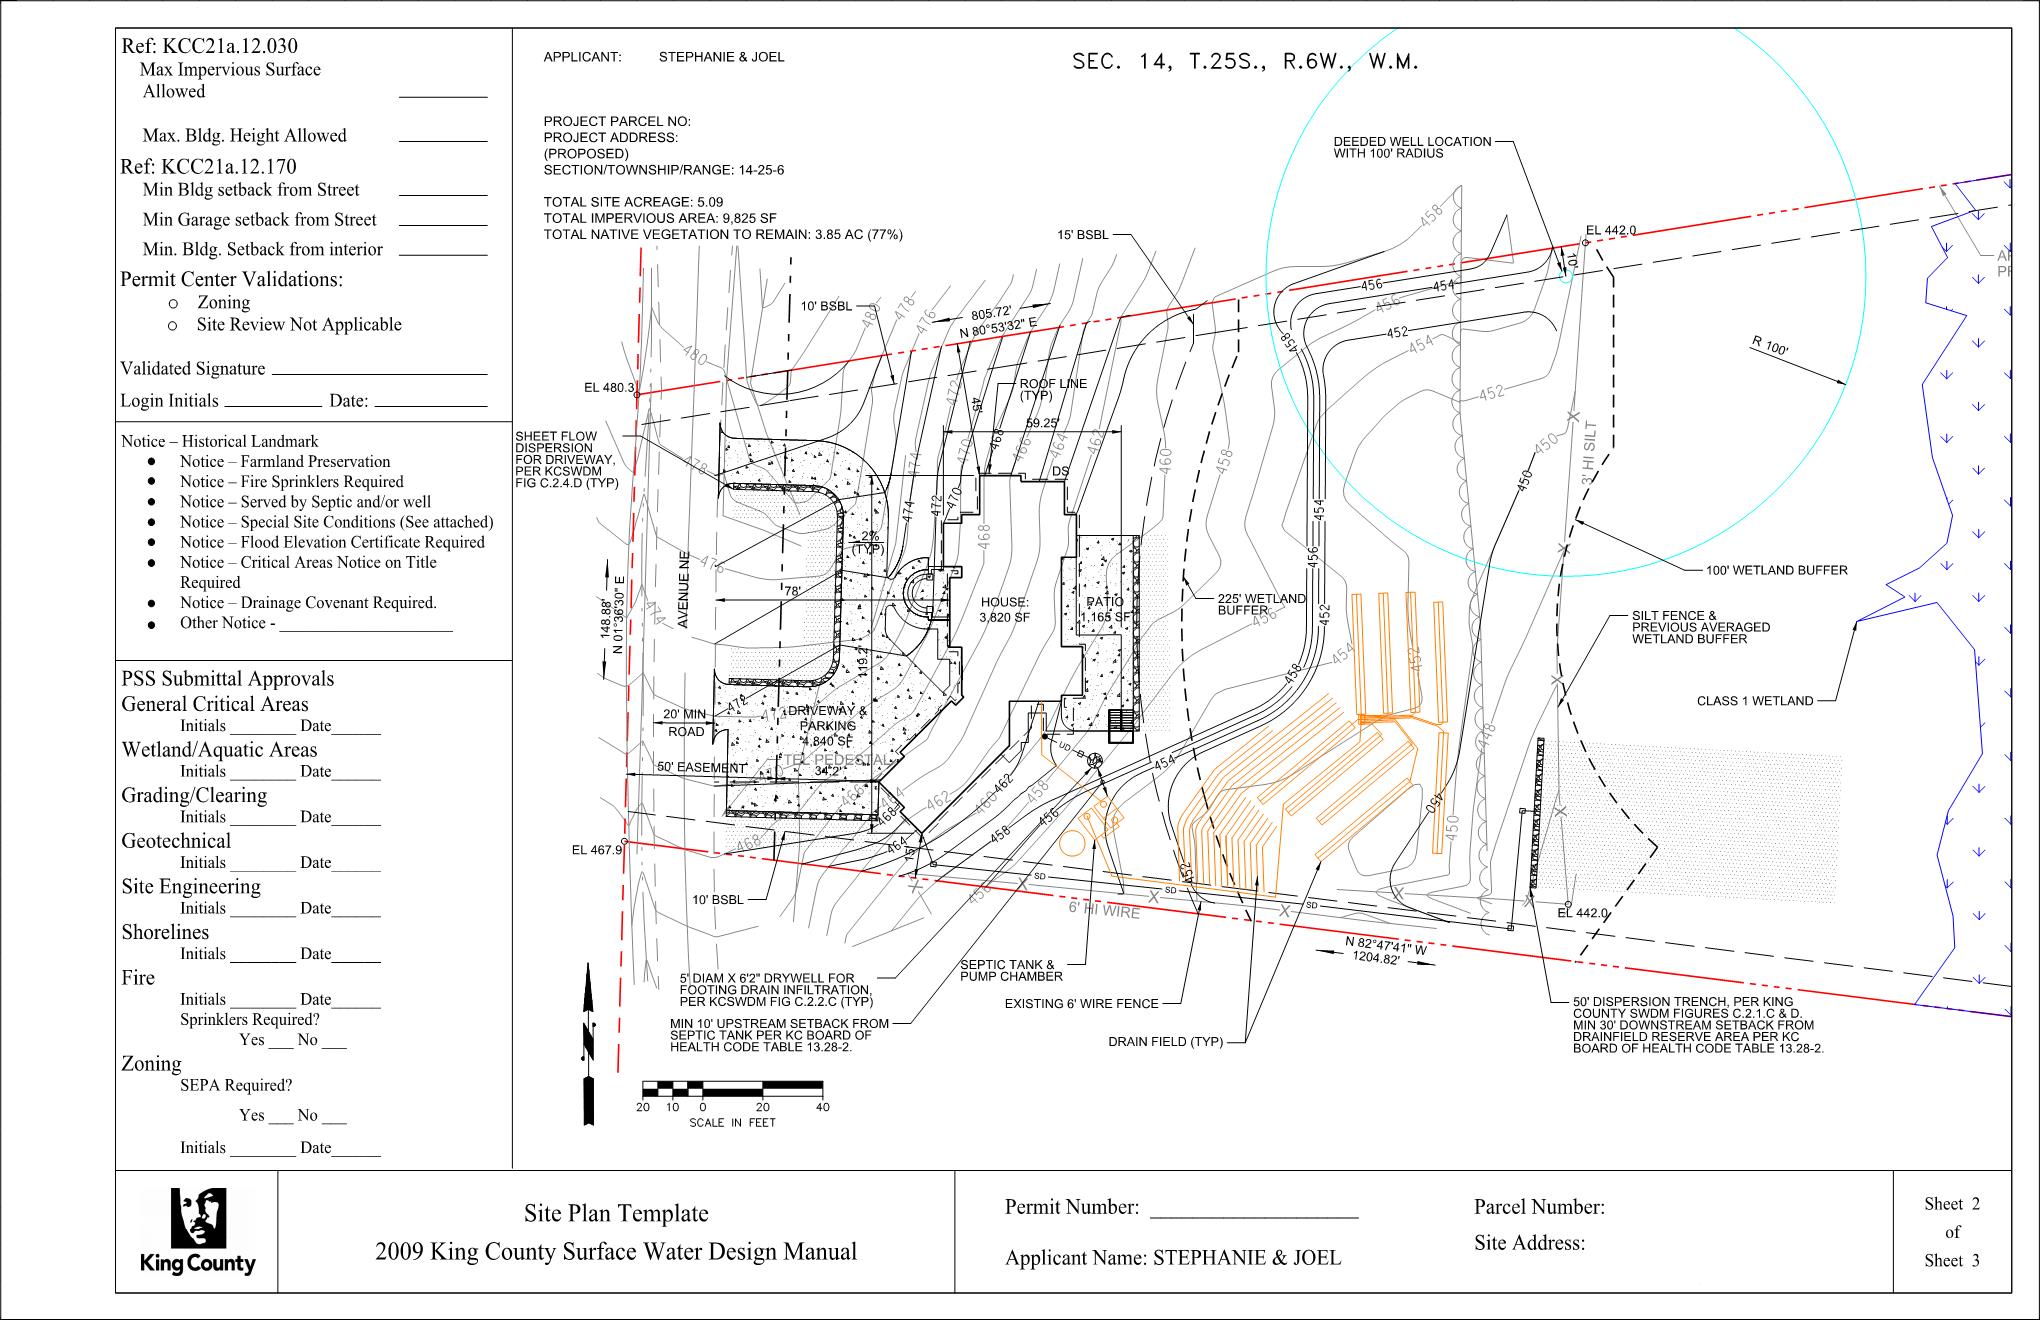
Back at the office, Dave really did fantastic! He utilized the (yellow) space that I graded for him and designed a pressure-distribution system. This is one of the less expensive types of septic systems (phew) as shown in the design below.

Pressure distribution septic design
After my approval of the design, and a check for the application to the King County Health Department, our septic design application and private well application were submitted to the health department. Huard Septic made the submittal really easy for us – they gathered all of the information needed for the submittal, including doing all of the private well research and submitted everything on our behalf. It truly couldn’t have been easier.
Our plans were submitted to the County on September 16th and since our property already had an approved septic design in the past, it was submitted as *expired*. Theoretically, it could have taken between 10 to 12 weeks to hear back from the County, but since it we were submitting approval for a previously approved (yet expired) design, it flew by, and two weeks later on October 2nd we received the approval in the mail!