Week 33: Drywall Taping, Tile Selections & Paint Colors

Drywall Taping & Mudding

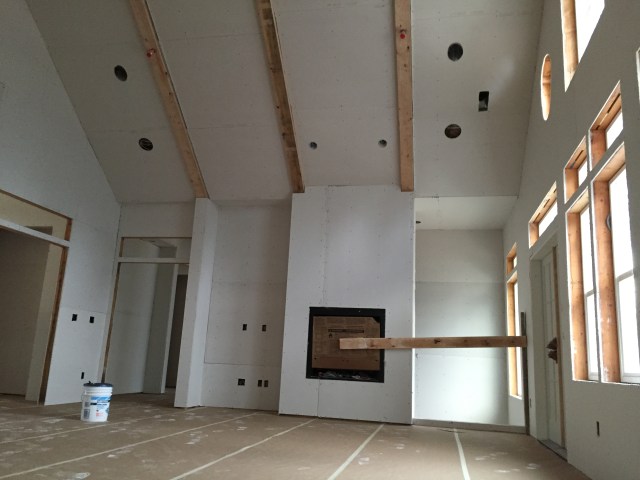
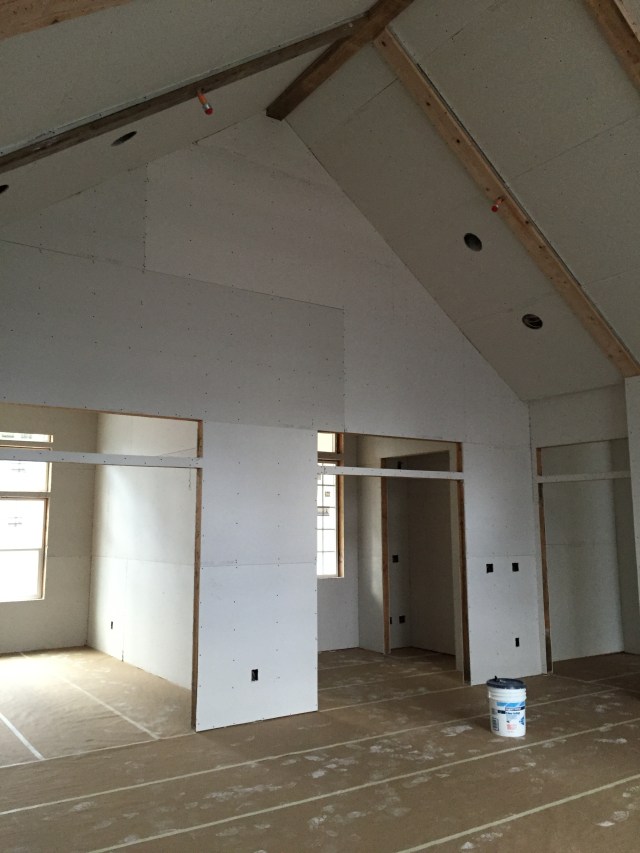
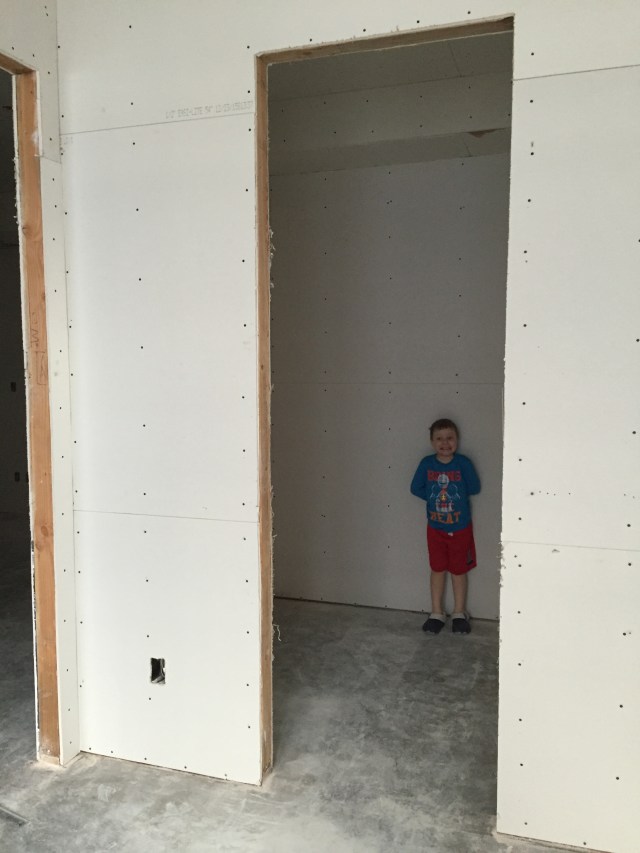
This week, Matt had subs out there taping and mudding the drywall.  The house feels like a total disaster zone – there’s drywall mud EVERYWHERE.  So happy there’s all that paper down – can’t wait for that to get balled up and thrown away!  My mom and I were out there on Wednesday morning to drop some stuff off with Matt and after both of us putting our hands in wet drywall mud we were ready to head out of there.
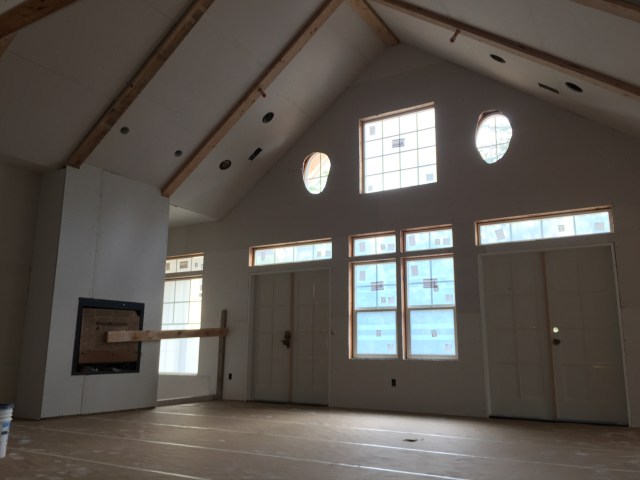
Tile Selections

While the guys at the house were taping & mudding the drywall, my mom and I were busy running around Seattle picking out tile…for the 4th time!  We’ve really been struggling with the tile for the house.  Matt has us working with a design firm which has a rep who meets us to write things down when we make selections at the stores, and then sends us a quote.  This rep woman has been 100% atrocious to work with though.  In person she’s fine – she doesn’t really give us much advice and really just watches me flip through racks of tile sample boards and waits for me to pick things out.  Every once in a while she finds something that’s a contender…a bit helpful.  Tile is one of the things in the house that I really don’t care to spend extra money on.  We got an initial bid from the rep to create our budget and I want to stick to that as much as possible.  The major problem now is that every time I meet with this woman in the stores she says that things are “definitely within my budget” then when she gets back to her computer and sends me an updated quote based on our selections it’s over-budget….EVERY TIME!  It’s been beyond frustrating.  So instead of taking one day to pick things out, we’ve met with her 4 different times.  And it’s super annoying because I have to take time off work and drive all the way up to Everett to the large CFM store to meet with her.  Luckily I have my mom as a partner in crime because I honestly don’t know how I would have done it without her.  My mom started calling her the “tile queen” and after last week when things were still over-budget, we said, “off with her head”!  😉

On Wednesday this week I took another day off work to re-select tile with my mom and the tile rep.  But before we met up with the tile queen, my mom and I headed to Georgetown on our own to find a tile design to be the inset backsplash detail behind the range in the kitchen.  We had a lot of fun shopping around at Ambiante and seeing all of the beautiful tile.  It was such a relaxing break to look for tile on our own and just work with the awesome sales associate at the store.

2016-01-20 11.50.20

Our favorite at the store is this Divinity Tile in their Artemis pattern. The darker tile is Carrera Velato Honed Marble and the lighter whiter tile is White Thassos Polished Marble. All of the little white tiles are cut and placed by hand, the larger ones are cut precisely using a water jet and at $135 per square foot, we’ll be buying just a little bit for a feature behind the range.  They had two sample boards at Ambiante which is why there’s a line going through the middle of the two boards.  If we end up going with this one, it’ll be continuous without any break.

After leaving Ambiante, we met up with the tile queen in Redmond to make some more changes to the other tile in the house (our 4th time trying to pick out tile within our budget with her).  After this meeting, this was the first time that when she said “this tile is more cost efficient” that she was right, and we were able to reduce some tiling costs.  I really hope this is the last time that I have to work with her!  Below are a few of the selections that we made.

Paint Colors & Sheen

On Sunday, my mom, dad, aunt, uncle, and little cousin came out to look at the house.  It was fun to get to show them around and give them a “during construction” tour.  My mom’s sees the house quite frequently because she’s always running errands with me, but my dad hadn’t seen it since we had bare studs – inside and out!  It’s been months!!  And I’m not sure if my aunt and uncle had ever seen it.

The main reason that we were there was to look at paint sheens and colors.  We settled on a satin finish that really looks more flat/satin than glossy/satin at all, which I like.  The paint color was a lot harder to settle on though…and I still don’t think we’ve 100% chosen a color!  For the ceiling, I used the cabinetry color which is Benjamin Moore’s Decorator’s White, so that choice was pretty easy.  But choosing an all-over color for the house seemed a lot harder to do.  I started the day thinking that I really would like Farrow & Ball’s Cornforth White (but at 50% because the color at 100% saturation was too dark for me).  But after putting one of the master tile floor pieces next to the tile I wasn’t so sure about my color choice.  To make matters worse, we don’t have a sample of what our main countertop choice looks like (Absolute White Quartzite), so we were only looking at pictures on my phone to jog our memory.  And after looking at the pictures we’re thinking that it looks pretty good with the Cornforth White (yay!), but that means maybe we need to re-select the master bath flooring tile.  Ugh!!  My mom and I are going to need to take a trip to the visit our slabs up in Woodinville with our paint and master bath tile to really figure this one out.

Other Updates

Besides all of the tile drama, and the drywall mudding, blown-in insulation was added in in the attic and the front door for the mudroom was installed!  The dutch door looks fantastic!!  And it’ll look even better once the siding is completed around it.

2016-01-24 16.28.27 HDR-2

The mudroom door turned out fantastic – I love the X detail on the door and how it’s mirrored in the garage doors. And the dutch door will be really fun when the boys are outside playing. Too bad all that paper is covering up the glass on the door.

Week 32: Drywall Installed

The drywall installation wrapped up this week and it was Absolutely Amazing to walk in and see all the walls with drywall.  The floors were covered with paper getting ready for  the taping & mudding next week so it looked crazy clean in there too!  Spencer and I visited on Saturday and had so much fun checking out each room.  We also ran some errands including heading to Home Depot for some tools to take off the plumbing fixtures on our bathtub and to Sherwin Williams to check out different paint sheens.  Surprisingly, Sherwin Williams has a great little coloring table for kids to sit at – perfect for Spencer!

Week 19: Ceiling Details, Cabinetry Walkthrough & Plumbing

This week a few really fun details were built in with the framing.  To begin with, the front entry way and dining windows were finally done.  The arches that they added really make the front area look finished.  There’s an arch over the front porch, as well as an arched window over the front door.  The arch over the front porch is a bit higher than the window over the door so that when you’re standing back at street level, you can see both of them.

By the end of the week, the arches have been added at the front of the house, and the roofing has been delivered and is ready to be installed.

By the end of the week, the arches have been added at the front of the house, and the roofing has been delivered and is ready to be installed.

The entryway windows have been framed.

The entryway windows have been framed.

The front arches were added to the porch, entry door and dining windows this week.

The front arches were added to the porch, entry door and dining windows this week.

The dining room window was also framed in this week.  At first it was a big shock because it had been open for so long it sort of took me by surprise not to see one big giant window in that room!  But it looks fantastic, and after making all the design changes to get this window and the dimensions ‘just right’ – I think it turned out fabulously.

The dining window was framed this week - It'll have three windows that open, then transoms, then an arched window.

The dining window was framed this week – It’ll have three windows that open, then transoms, then an arched window.

On the inside of the house, a few of my favorite details were built.  First to finish up the dining room, the tray ceiling was completed, and the beginning of the “X” within the tray was added.  Love it!  And notice how the arched window will leave just enough room for trim above it…I think it’ll look great once it’s all finished.

The tray ceiling and "X" pattern on the ceiling were constructed.

The tray ceiling and “X” pattern on the ceiling were constructed.

The windows in the dining room look SO GOOD!

The windows in the dining room look SO GOOD!

And the tray ceiling was also added in the master bedroom as well.  All of the tray ceilings in the house are 18″ from the walls, and 10″ tall.

The tray ceiling in the master was added this week.

The tray ceiling in the master was added.

The fireplace framing was built this week - we'll have a bench under the the fireplace, so it's raised up off the floor.

The fireplace framing was built this week – we’ll have a bench under the the fireplace, so it’s raised up off the floor.

The staircase is located back behind the fireplace, and the curvature in the staircase was finished up this week.

The staircase is located back behind the fireplace, and the curvature in the staircase was finished up this week.

Cameron came with me after soccer practice on Wednesday night to check out some of the progress which included some other areas in the house that he had fun seeing…

First stop was checking out he built-in bench in the office. Eventually bookshelves will line the wall to the right, and this will be such a fun spot to read with the boys - plenty deep and big enough!

First stop was checking out he built-in bench in the office. Eventually bookshelves will line the wall to the right, and this will be such a fun spot to read with the boys – plenty deep and big enough!

Cam's next stop was the master shower. He got such a kick that the drain hole was cut and he could see right into Spencer's bedroom underneath. He's waiving "hi" to Spencer in this pic!

Cam’s next stop was the master shower. He got such a kick that the drain hole was cut and he could see right into Spencer’s bedroom underneath. He’s waiving “hi” to Spencer in this pic!

Cam's last stop was his bathroom. We contemplated rearranging this room, but he really liked that his vanity would be separated from Spencer's so we decided to keep it the way it is now. He's already pretending to brush his teeth at the sink!

Cam’s last stop was his bathroom. We contemplated rearranging this room, but he really liked that his vanity would be separated from Spencer’s so we decided to keep it the way it is now. He’s already pretending to brush his teeth at the sink!

On Tuesday morning, my mom and I met with Matt and the rep from Canyon Creek Cabinets to walk through the house and discuss the different cabinet layouts.  It was a lot of fun to discuss my different ideas as well as get feedback from the rep and what he thought we should do.  Now he has to go back and lay things out for us to approve.  That’ll be exciting to see those once they’re done.

The plumbers started this week, so we really had to nail down all of the sink locations.  The only ones that were really in question were the boys’ bathroom sinks and the prep island sink.  The boys’ bathroom has a pretty decent sized linen closet in there – for all of their towels, sheets, and swim gear.  The design was to have the linen closet separating each of the boys’ sink vanities so that they could each have their own ‘space’.  The closet takes up quite a bit of space, and I was worried that it makes the space feel a little cramped.  So we discussed rearranging the room.  In the end, we decided to make the closet a couple inches less deep so that it didn’t protrude into the room as far and keep the vanities separate.  Cameron really liked that, and I think it’ll be nice for the boys to have really great storage solutions in there.

Plumbing started this week! Here's a picture in the kitchen where the sink and fridge will go.

Plumbing started this week! Here’s a picture in the kitchen where the sink and fridge will go.

On Saturday, Joel and I went to check things out at the house and we decided to rearrange things a bit in the mudroom.  We’re going to put the boys’ bench and shoe cubbies to underneath the window and get a narrower desk for where their cubbies used to be.  This should give them more space to put their shoes and all of the bags they bring home from school and practices.

Back up in the first picture, you can see that roofing supplies were delivered and they’ll be starting on that next week!

Week 16: Roof Sheathing & Well House Foundation

This week the framers were at the house and primarily focused on sheathing the roof.  Sheathing is when the put the plywood on top of the trusses – this creates the structure for the roof to be installed on.  Joel and I swung by on Thursday early afternoon to see the progress on our way out to Suncadia for a quick getaway with Joel’s work.  They had quite a bit of the sheathing already installed and although it doesn’t look like much was really ‘built’…it’s amazing how adding the roof really makes it feel like rooms.

A glimpse of the progress on Thursday morning.

A glimpse of the progress on Thursday morning.  I’m still not sure when they’ll put the gable on the front of the garage. I would have thought it would have been more logical to build that first and then put up the sheathing.  But what do I know about building houses!?

Quite a bit of the roof sheathing went on this week.

Quite a bit of the roof sheathing went on this week.  The space at ridge of the roof will be where our ridge vents will be located.

We dropped by the house on the way home from our weekend getaway on Sunday and quite a bit more work was done on it…they even started the gable on the garage!

We stopped by the house on the way back from Suncadia on Sunday and they definitely got a lot more done!

We stopped by the house on the way back from Suncadia on Sunday and they definitely got a lot more done!

They even started on the gable on top of the garage!

They even started on the gable on top of the garage!

This will be our office, which will have a vaulted ceiling.

This will be our office, which will have a vaulted ceiling.

The dormers above the window in the master closet and the laundry room haven't been started yet.

The shed dormers above the windows in the master closet (shown in pic) and the laundry room haven’t been started yet.

Cameron checked out the house with us this time, and liked the sawhorses!

Cameron checked out the house with us this time, and liked the set of sawhorses!

The back of the house still needs some sheathing, but it's coming along!

The back of the house still needs some of the roof sheathing, but it’s coming along!

Now it's really easy to see the covered bbq area outside of the kitchen.

Now it’s really easy to see the shape of the covered bbq area outside of the kitchen.

Here's what the house looks like from the front as you'd drive up to it.

Here’s what the house looks like from the front as you’d drive up to it.

Also on Thursday they poured the slab for the well house.  Sheds are allowed to be built to a size of 200 square feet without needing to be permitted through King County.  We ended up building a shed that’s 12′ x 12′ so 144 square feet.  I contemplated building it as big as we could, but Matt convinced me that 12′ x 12′ is definitely big enough to hold everything we we want to and it won’t look huge and out of place.  So…what do we need a well house for?  We will have water storage tanks that will store water as it comes out of the well.  I think the intent is to have 2 large storage tanks.  One for water that we use in the house (potable water) that we’ll end up treating for water quality.  And the other tank will store water that will serve two purposes – the lawn sprinkler system and our house fire sprinklers.  We’re required to have fire sprinklers at our house because King County requires that the fire department needs to be able to reach all exterior walls of the house by walking 150′ around the house.  Unfortunately, with the shape of our house, and how it sits on the property you can’t walk 150′ around both sides of the house and cover the entire back of the house.  So we’re required to put in fire sprinklers.  One good thing is that it’s safer for us – after building and spending so much time on the house, at least if there’s a fire I know that it’ll be put out instantly – or at least delay our house from burning down until the fire department could reach us 🙂  Plus, I think we’ll end up getting lower insurance rates too!

The foundation for the well house was poured this week.

The foundation for the well house was poured this week – a little hard to see, but it’s way down there and actually there’s a guy down there finishing the concrete surface!

Up close pic of the well house foundation slab.

Up close pic of the well house foundation slab.

Week 11: Framing the Main Level Begins

This week they started to build the walls for our main level, which was fantastic because now you can see our home start to take shape from the street.  And we’re able to really walk through the space and see how it’s all coming together.  There’s still a lot more framing to do on the first floor, but below are some in progress photos which show pretty much what some of the spaces will end up feeling like.

By the end of the week, there was a TON of progress on the main level!

By the end of the week, there was a TON of progress on the main level!

Our entry!! The top window will end up being arched, and we're also having them start the side windows lower - so those will increase in height.

Our entry!! The top window will end up being arched, and we’re also having them start the side windows lower – so those will increase in height.

This is what the office windows look like from the outside. It faces the street at the front of the house.

This is what the office windows look like from the outside. It faces the street at the front of the house.  We’ll have vaulted ceilings in here.

This will be the eating area in the kitchen. Joel and I love all of the windows, and how much light it will let into the kitchen.

This will be the eating area in the kitchen. Joel and I love all of the windows, and how much light it will let into the kitchen.

This is also in the kitchen - our sink will be centered underneath the three windows and that door opening will lead outside to the deck.

This is also in the kitchen – our sink will be centered underneath the three windows and that door opening will lead outside to the deck.

These are the windows and door to the deck in our master bath. We love the view!

These are the windows and door to the deck in our master bath. We love the view!

Still framing in progress! Lots to do next week for sure. This will end up being the back wall of the great room where we'll have a set of french doors.

Still framing in progress! Lots to do next week for sure. This will end up being the back wall of the great room where we’ll have a set of french doors.

Throughout the build, we’ve been having the cutest deer family visit us!  There’s definitely a male, female, and I think three (maybe four) little baby deer.  So cute!!

The daddy deer!

The daddy deer!

The cute couple hanging out in our backyard!

The cute couple hanging out in our backyard!

Design Changes

Our only design hiccup this week was that the dining room windows were sized to be 11-feet tall at the height of the curve, but the architect spec’d that the ceiling height in the dining room also be 11-feet!  Eeek, that can’t happen!  So I spent a few hours Tuesday night fixing it and coming up with the plan below.  I ended up having to adjust both the dining room and the entry windows to make it all work. But I think it’ll turn out great!  And bonus, we were able to get rid of the vaulted ceiling in our foyer which I was never a huge fan of anyways!

I changed the entry and dining windows this week to work with the 11' ceiling height.

I changed the entry and dining windows this week to work with the 11′ ceiling height.