This week they focused on more framing on the house. The gable on the front of the garage was completed and the roof sheathing was finished up. They also framed both of the shed dormers above the laundry room and the master closet. It’s looking pretty good, and it’s exciting to see what it feels like with a ‘roof’. I was out there earlier in the week talking with Matt about locations for blocking for things like towel rings and millwork. There’s so many details – and things you normally don’t have to think about – like which side you like the toilet paper holder located on.

The front of the house is getting pretty far along. The gable is up in above the garage and the roof line is finished above the laundry room shed dormer.

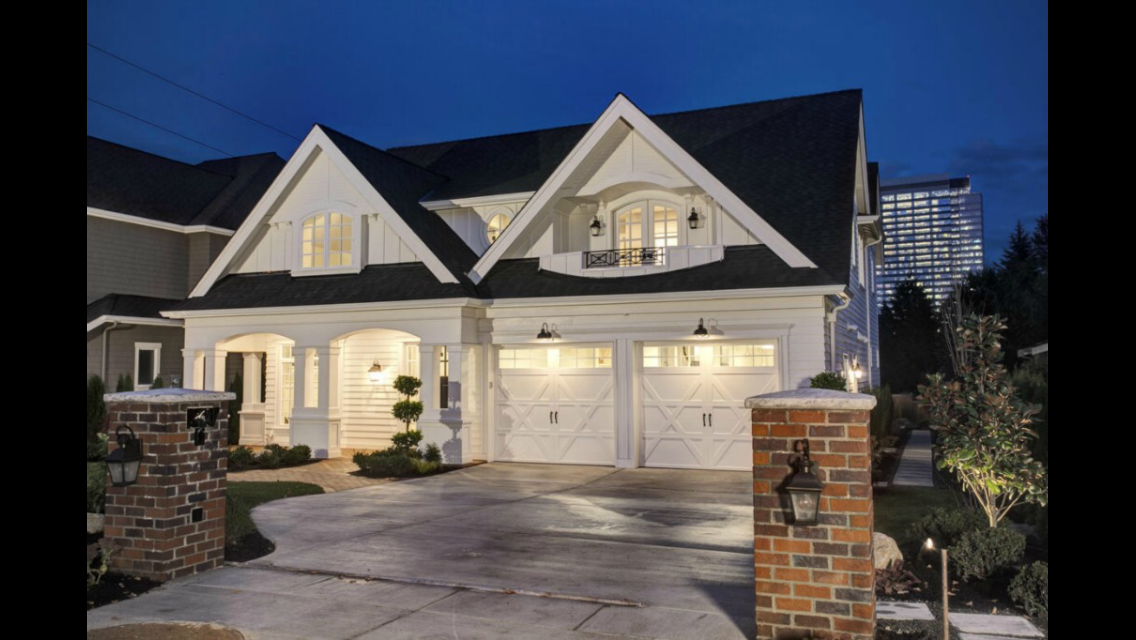
The gable above the garage was worked on this week. I think it turned out great!

Here’s the progress made on the back of the house – the sheathing is all finished!

The view of the back of the kitchen windows.

Here’s what the back of the house looks like from right underneath it.

Here’s a panoramic of the back of the house.

The shed dormer was built to finish up the laundry room roof this week.

This wall will eventually have our stove centered between the doors. The opening on the right leads to the butler’s pantry & dining room. And the opening on the left leads to the pantry, laundry & mudroom.

This is a view from the kitchen into the great room. The opening on the left will be a pass-through with cabinetry in front of it.

Spencer came with us today to check out the progress on the house. He said that the house is built, it just needs a ‘couple more things’!

There’s Joel – checking out the kitchen!

Here’s a view of the kitchen windows. Joel and I can’t decide if we want built-in benches here and where to add them in the space.

The great room looks really good – although the ceiling is too high, so we decided this week that we’re going to drop that down.
On Saturday, we scheduled our first trip to pick out some of the finishes. My mom and I went up to Everett to CFM which has a lot of selections to choose from. We spent a couple hours with the designer (Jodi) and really didn’t get a whole lot picked out. We settled white oak floors finished on site. That’ll be the main floor covering for the upstairs and downstairs. Because the downstairs is a slab on grade we had to go with an engineered hardwood. But we can actually get engineered wood that can be finished onsite so we can have it exactly match the upstairs – love that! I’m pretty sure that we’ll go with a hardwood stain that’ll be pretty close (maybe a touch lighter) than natural white oak, but since it’ll be finished onsite we’ll get to choose the stain color after it’s installed.

Here’s an example of the color of white oak that we’ll have. Since we’re having it finished onsite it won’t really exactly look like this, but it at least gives us an idea of what the finish will ultimately look like.
Other than that, we decided on the type of carpet (which was a super soft one from Shaw), but haven’t chosen the color yet. Jodi is going to get us a bigger carpet samples in the colors we like so that we don’t have to choose from mini carpet squares – and even that we’ll wait until after the hardwood stain has been chosen and we can see the carpet in our house. It was so difficult to really see the true color of the carpet samples anyhow, so I’m glad we’ll get to choose once we’re more finished with the house. We tried to pick out some of our tile, but Jodi was bummed that we didn’t have our counters picked out yet since that really determines the backsplash and floor tile colors. We looked at a bunch of tiles while we were there, but it was difficult to find exactly what we were looking for. And it’s surprising how fast 2 hours speeds by!
So, after a couple hours with Jodi, my mom and I went on our own. First we headed to United Tile just down the street where we actually found the floor tile that we’re going to use in the mudroom. We ended up going with the Crossville Buenos Aires Mood Porcelain in the color Pilar. It will be a 12×24 tile – laid at a brick pattern. And we might end up putting some tile around the border of the room – same tile, just a different size. We’ll see!

We chose this tile for the mudroom flooring. The flooring in the background is the hardwood that we’re going to have.
Then we headed down to Georgetown in Seattle to look at slabs for countertops. We now realize that it’s a priority for us to pick those out before we choose any of the other tile, so we were on a mission. The first place we went to was META and we found the perfect slab for Joel’s bar downstairs. It’s a Fantasy Brown Quartzite with a Leathered finish. The bar cabinets are going to be gray, with a wood bar top, so this is the perfect blend of gray/white/brown to tie everything together.

Joel’s bar countertop for downstairs.

We found it at META Marble & Granite in Seattle – it’s called Fantasy Brown Quartzite with a leathered finish.
We went to so many places – MSI, Oregon Tile & Marble, Pental, Daltile and META and didn’t find any that we liked for the rest of the house! Last year when we were looking at slabs for my mom’s kitchen I found this quartzite and totally loved it! I should have just bought it back then, but hindsight’s 20/20 I guess. We couldn’t find any gray/white quartzite that I liked in Seattle.

Last year we found this amazing Silver Storm Quartzite…should have just bought it back then!
Next we headed to Kent to check out a couple of places we knew about. And we ended up finding this quartzite at Cosmos. It’s just ok – I don’t think I’m a big fan of how splotchy/spotted it looks. I like the colors, but the patterning of the stone isn’t something I’d be happy with in the long run.

This slab of “New Super White” Quartzite had the right colors – but was too splotchy and not quite right.
After passing on the stone at Cosmos, we checked out Marble & Granite Specialties and found this one. LOVE!!! Isn’t it great? Gray/white, simple, clean – exactly what we were looking for. The problem though – M&GS is a fabricator and they own the slab. That means that if we want these slabs, then we have to use them to fabricate them (cut & install the slabs). And that means we can’t use Jodi’s fabricator – and since Matt’s never used them before we really have no clue if they do a quality job or not. Such a bummer. We have a call into Jodi so see if she could find it elsewhere for us. Cross our fingers. If she can’t find it, we’ll have to choose if we want to wait to find something different that Jodi can get and install for us, or if we want to take a chance and have the other people fabricate it.

This Absolute White Quartzite is great! Hopefully Jodi can find it for us so we can use her fabricators.