This week the framers were at the house and primarily focused on sheathing the roof. Sheathing is when the put the plywood on top of the trusses – this creates the structure for the roof to be installed on. Joel and I swung by on Thursday early afternoon to see the progress on our way out to Suncadia for a quick getaway with Joel’s work. They had quite a bit of the sheathing already installed and although it doesn’t look like much was really ‘built’…it’s amazing how adding the roof really makes it feel like rooms.

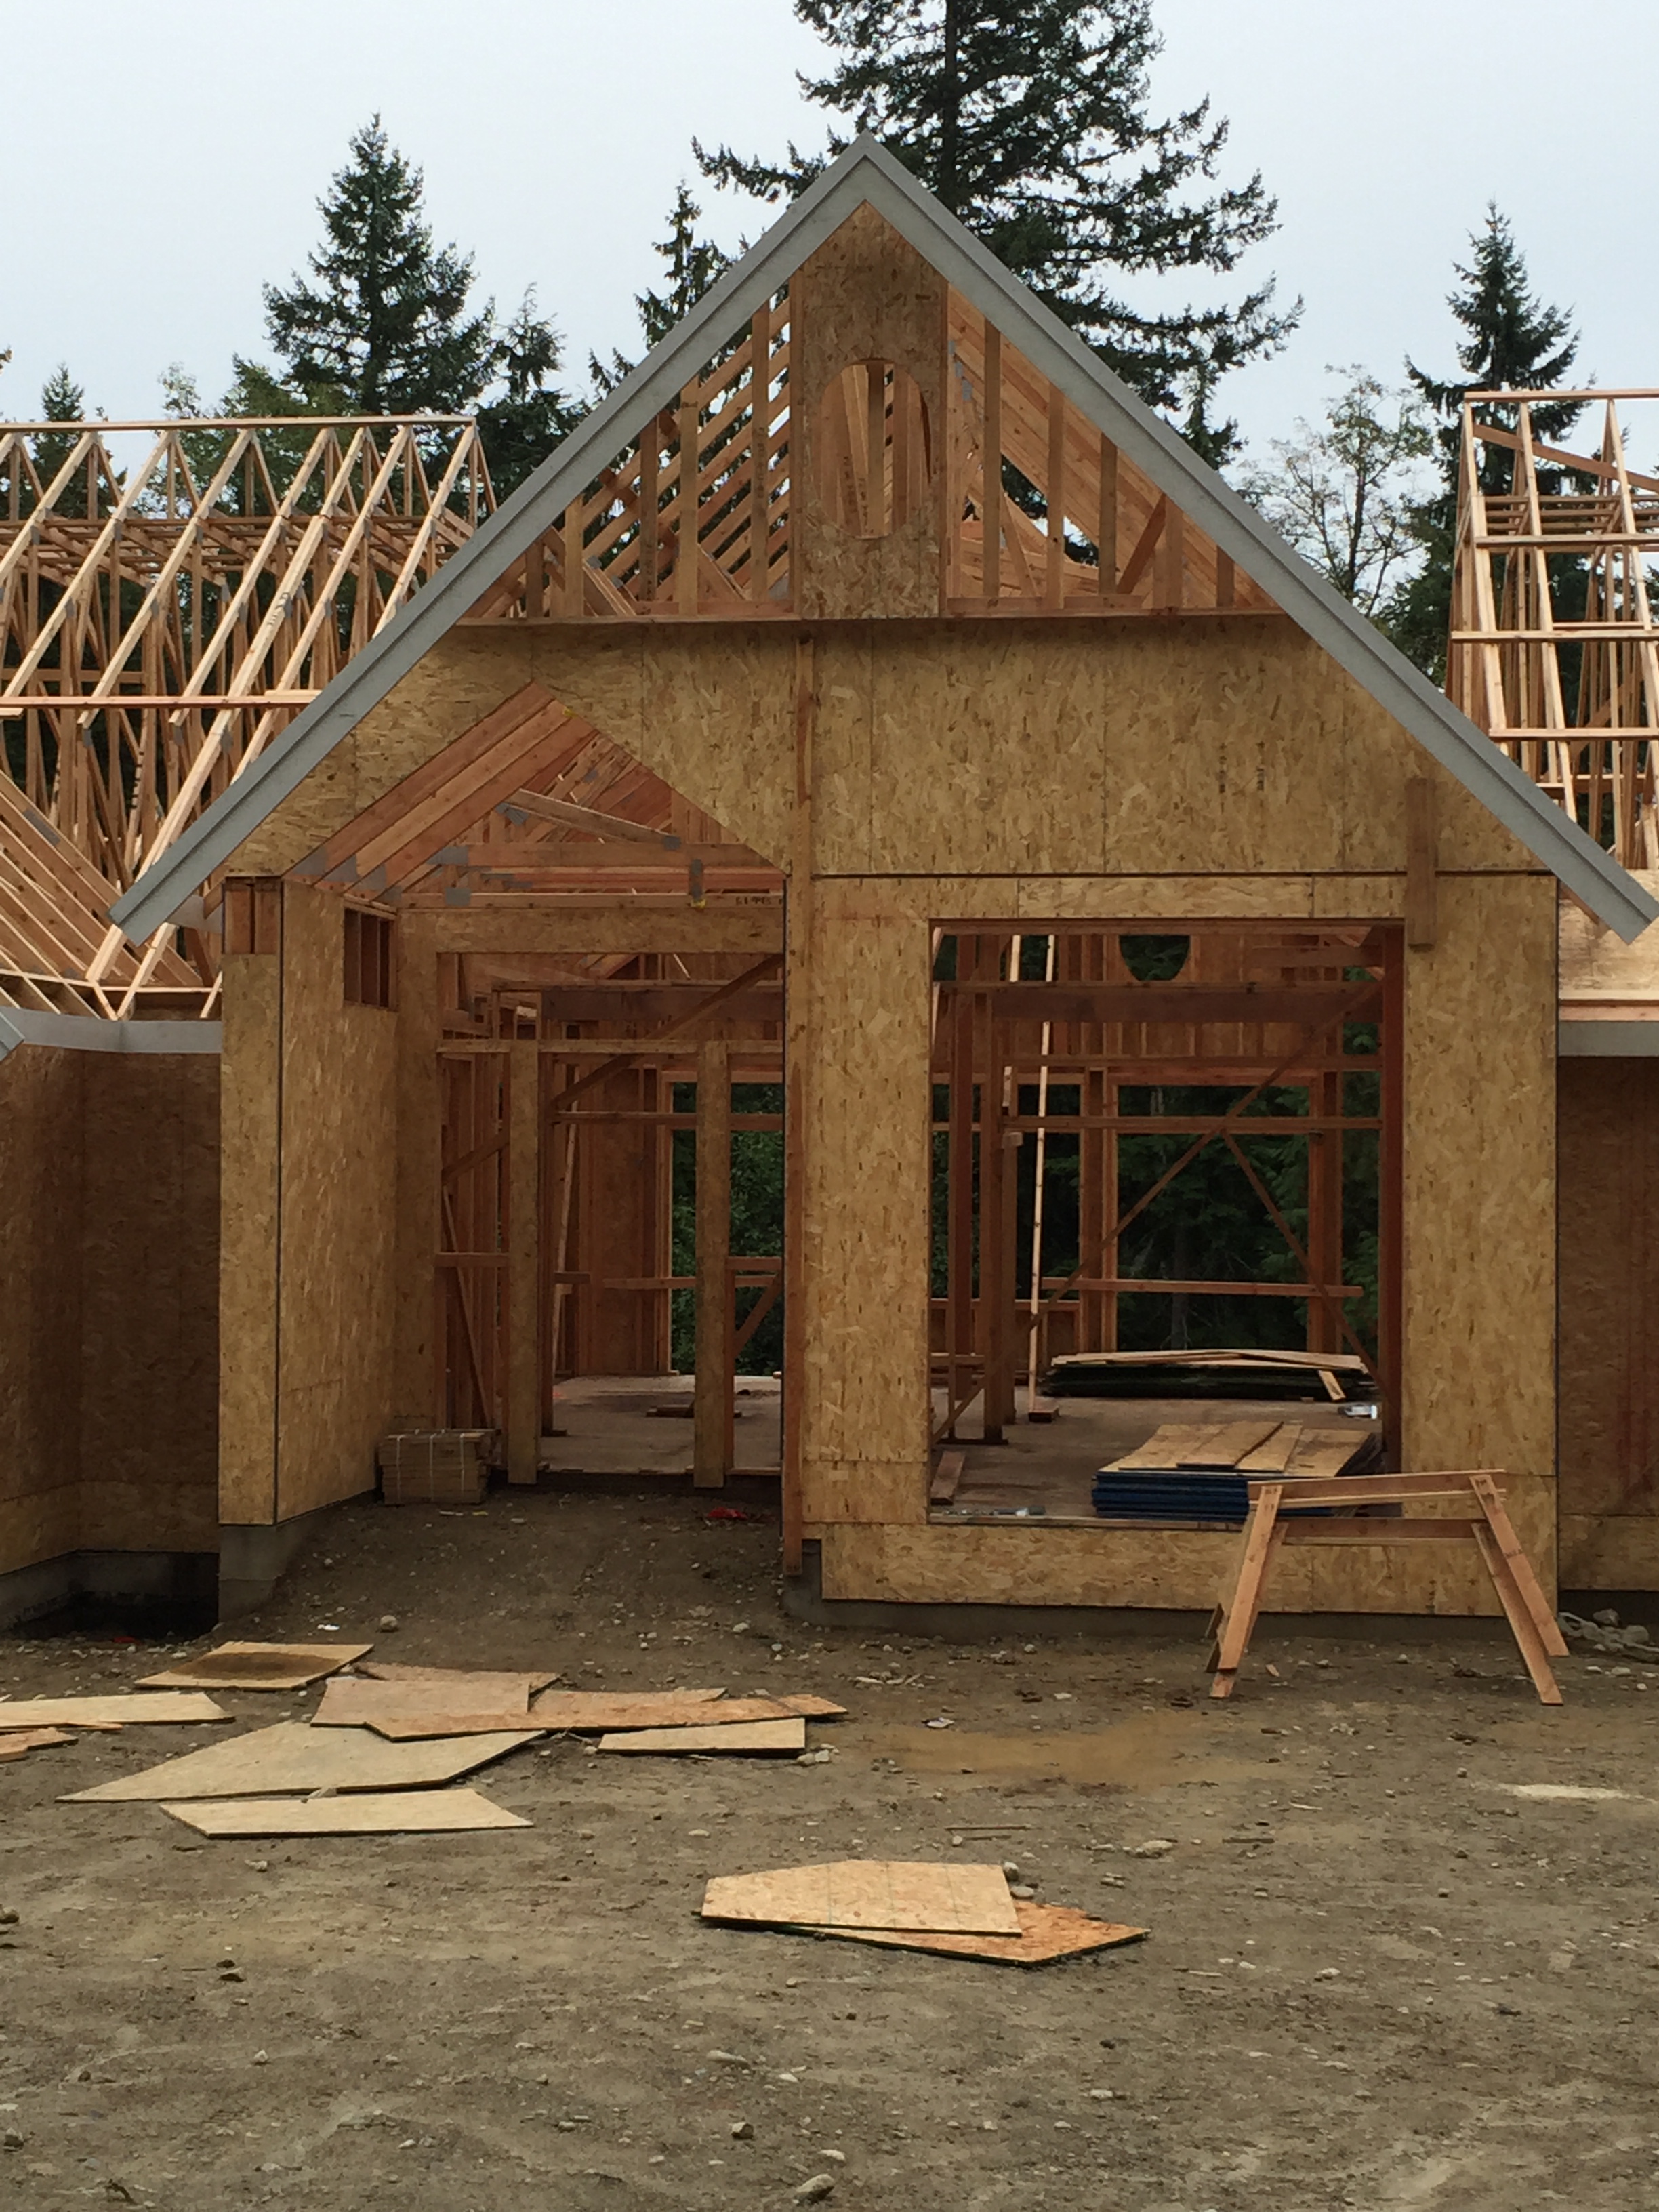
A glimpse of the progress on Thursday morning. I’m still not sure when they’ll put the gable on the front of the garage. I would have thought it would have been more logical to build that first and then put up the sheathing. But what do I know about building houses!?

Quite a bit of the roof sheathing went on this week. The space at ridge of the roof will be where our ridge vents will be located.
We dropped by the house on the way home from our weekend getaway on Sunday and quite a bit more work was done on it…they even started the gable on the garage!

We stopped by the house on the way back from Suncadia on Sunday and they definitely got a lot more done!

They even started on the gable on top of the garage!
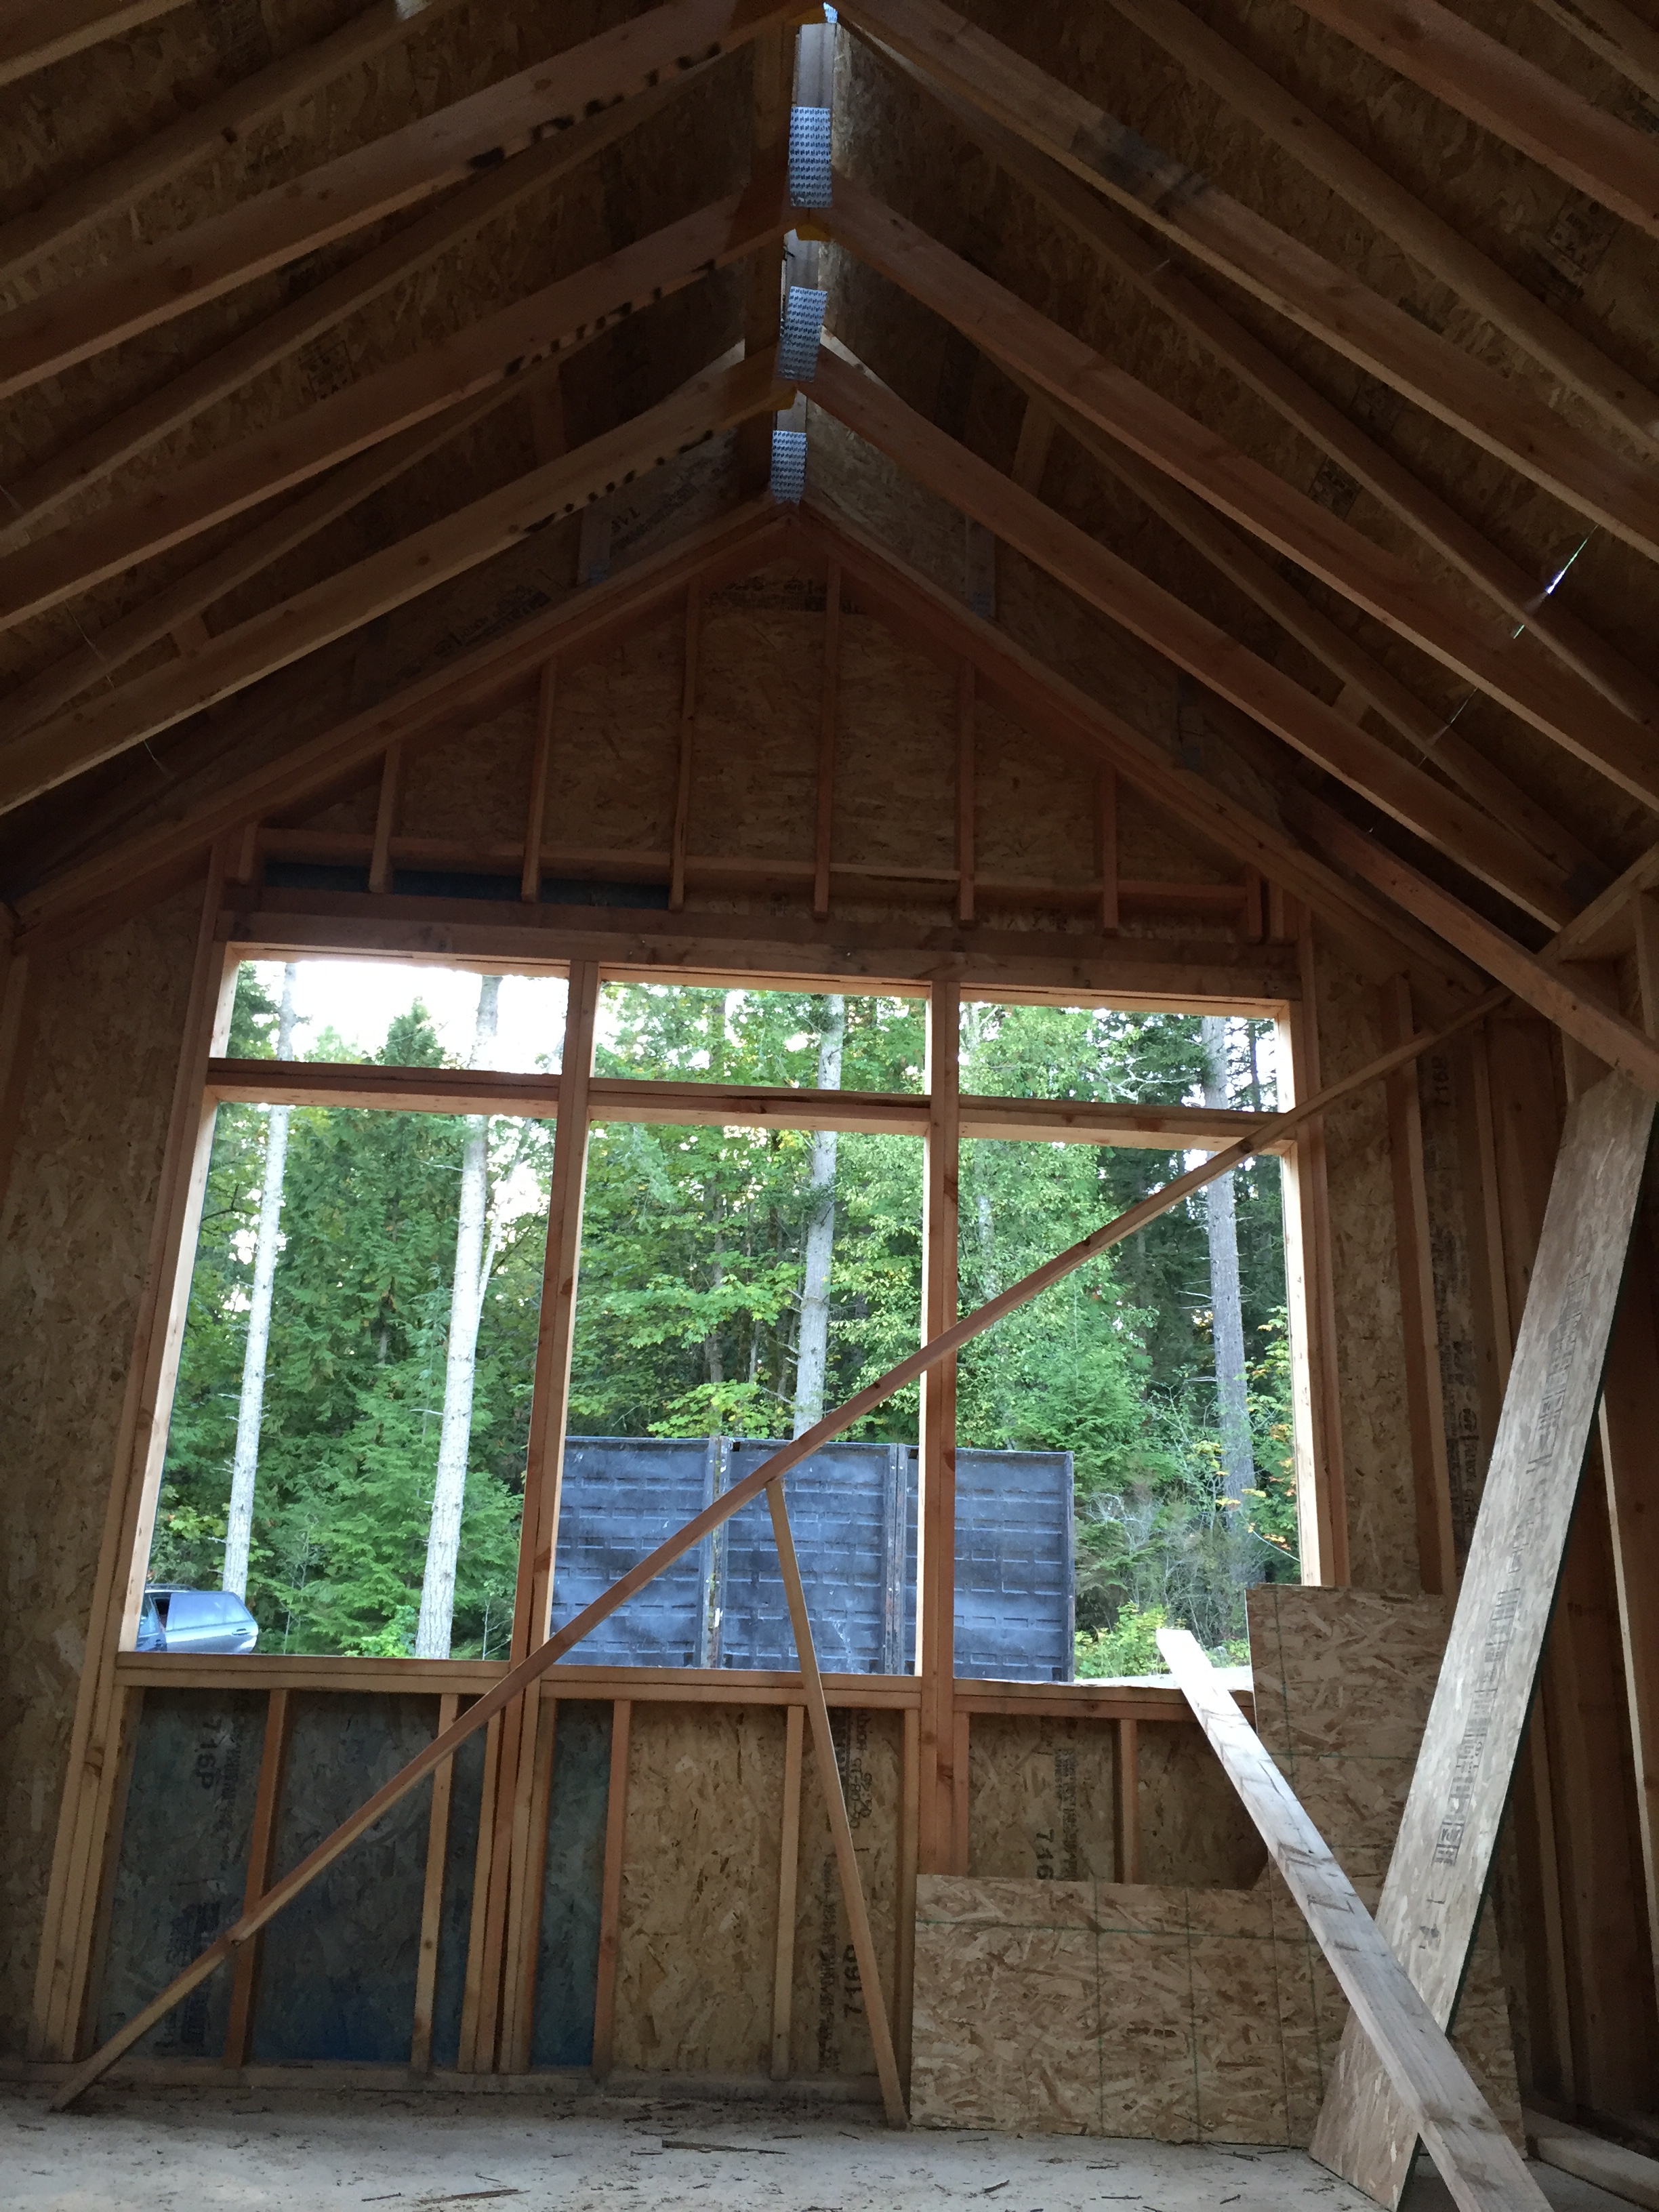
This will be our office, which will have a vaulted ceiling.

The shed dormers above the windows in the master closet (shown in pic) and the laundry room haven’t been started yet.

Cameron checked out the house with us this time, and liked the set of sawhorses!

The back of the house still needs some of the roof sheathing, but it’s coming along!

Now it’s really easy to see the shape of the covered bbq area outside of the kitchen.
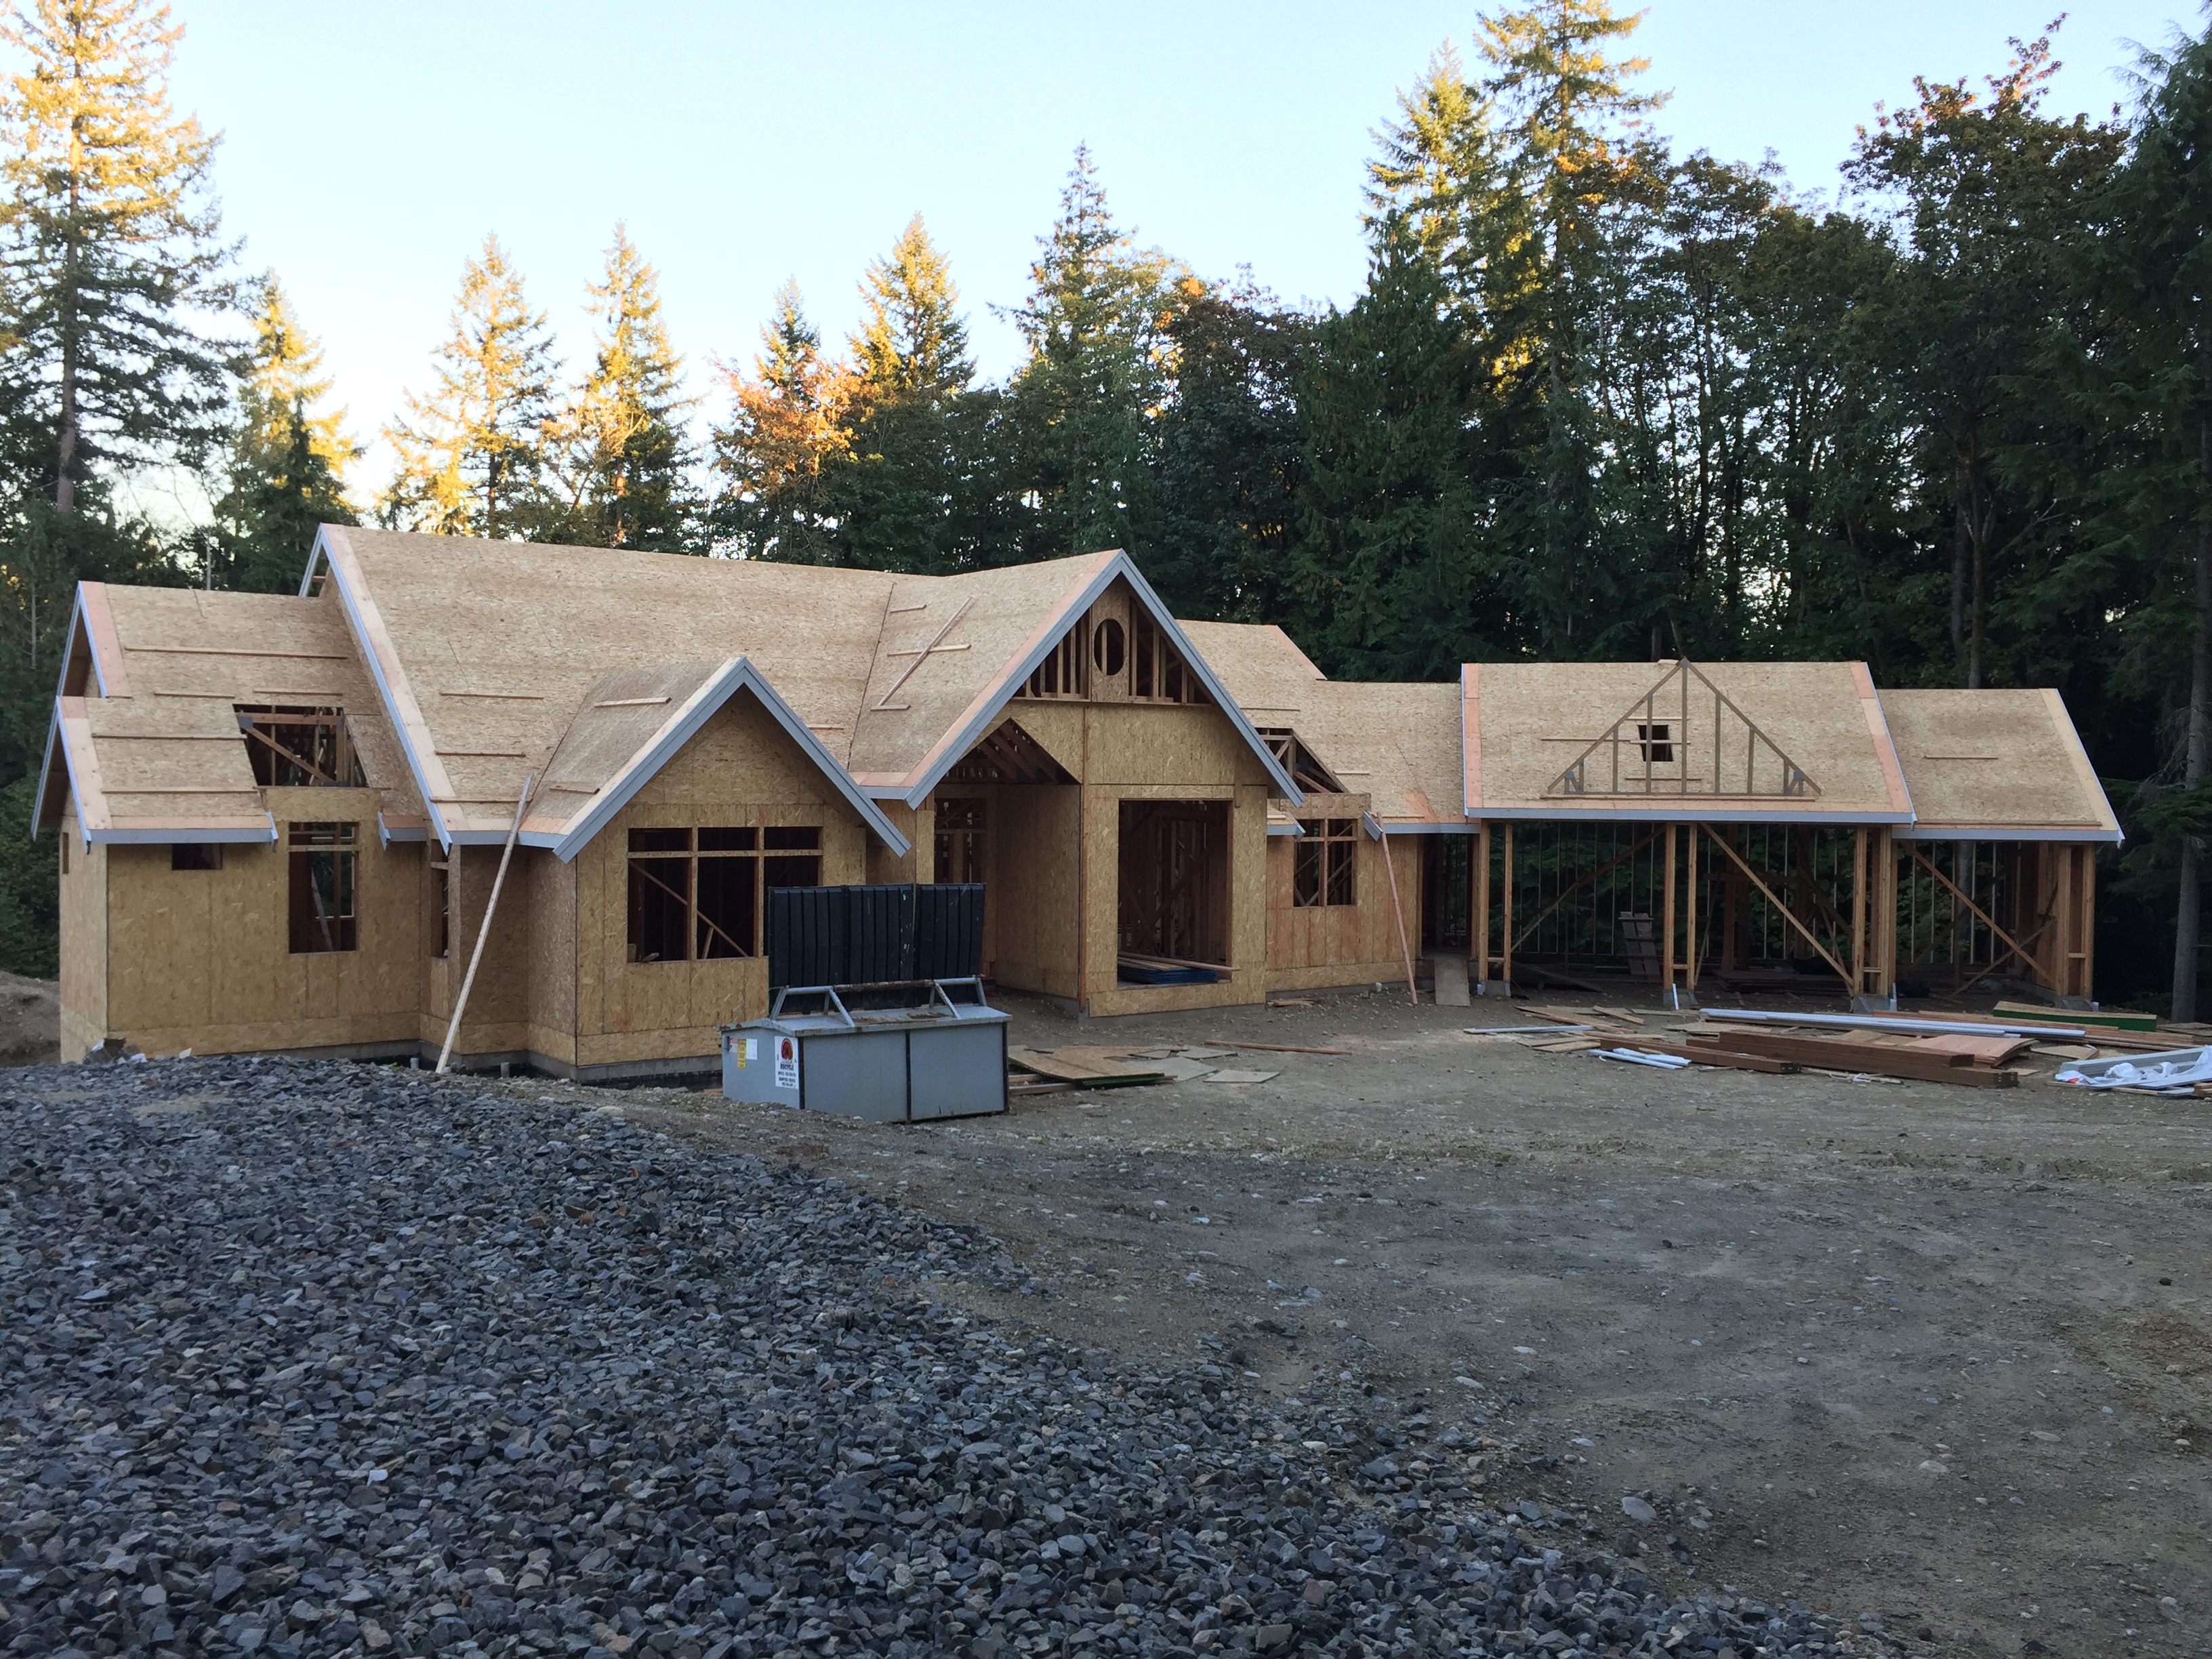
Here’s what the house looks like from the front as you’d drive up to it.
Also on Thursday they poured the slab for the well house. Sheds are allowed to be built to a size of 200 square feet without needing to be permitted through King County. We ended up building a shed that’s 12′ x 12′ so 144 square feet. I contemplated building it as big as we could, but Matt convinced me that 12′ x 12′ is definitely big enough to hold everything we we want to and it won’t look huge and out of place. So…what do we need a well house for? We will have water storage tanks that will store water as it comes out of the well. I think the intent is to have 2 large storage tanks. One for water that we use in the house (potable water) that we’ll end up treating for water quality. And the other tank will store water that will serve two purposes – the lawn sprinkler system and our house fire sprinklers. We’re required to have fire sprinklers at our house because King County requires that the fire department needs to be able to reach all exterior walls of the house by walking 150′ around the house. Unfortunately, with the shape of our house, and how it sits on the property you can’t walk 150′ around both sides of the house and cover the entire back of the house. So we’re required to put in fire sprinklers. One good thing is that it’s safer for us – after building and spending so much time on the house, at least if there’s a fire I know that it’ll be put out instantly – or at least delay our house from burning down until the fire department could reach us 🙂 Plus, I think we’ll end up getting lower insurance rates too!
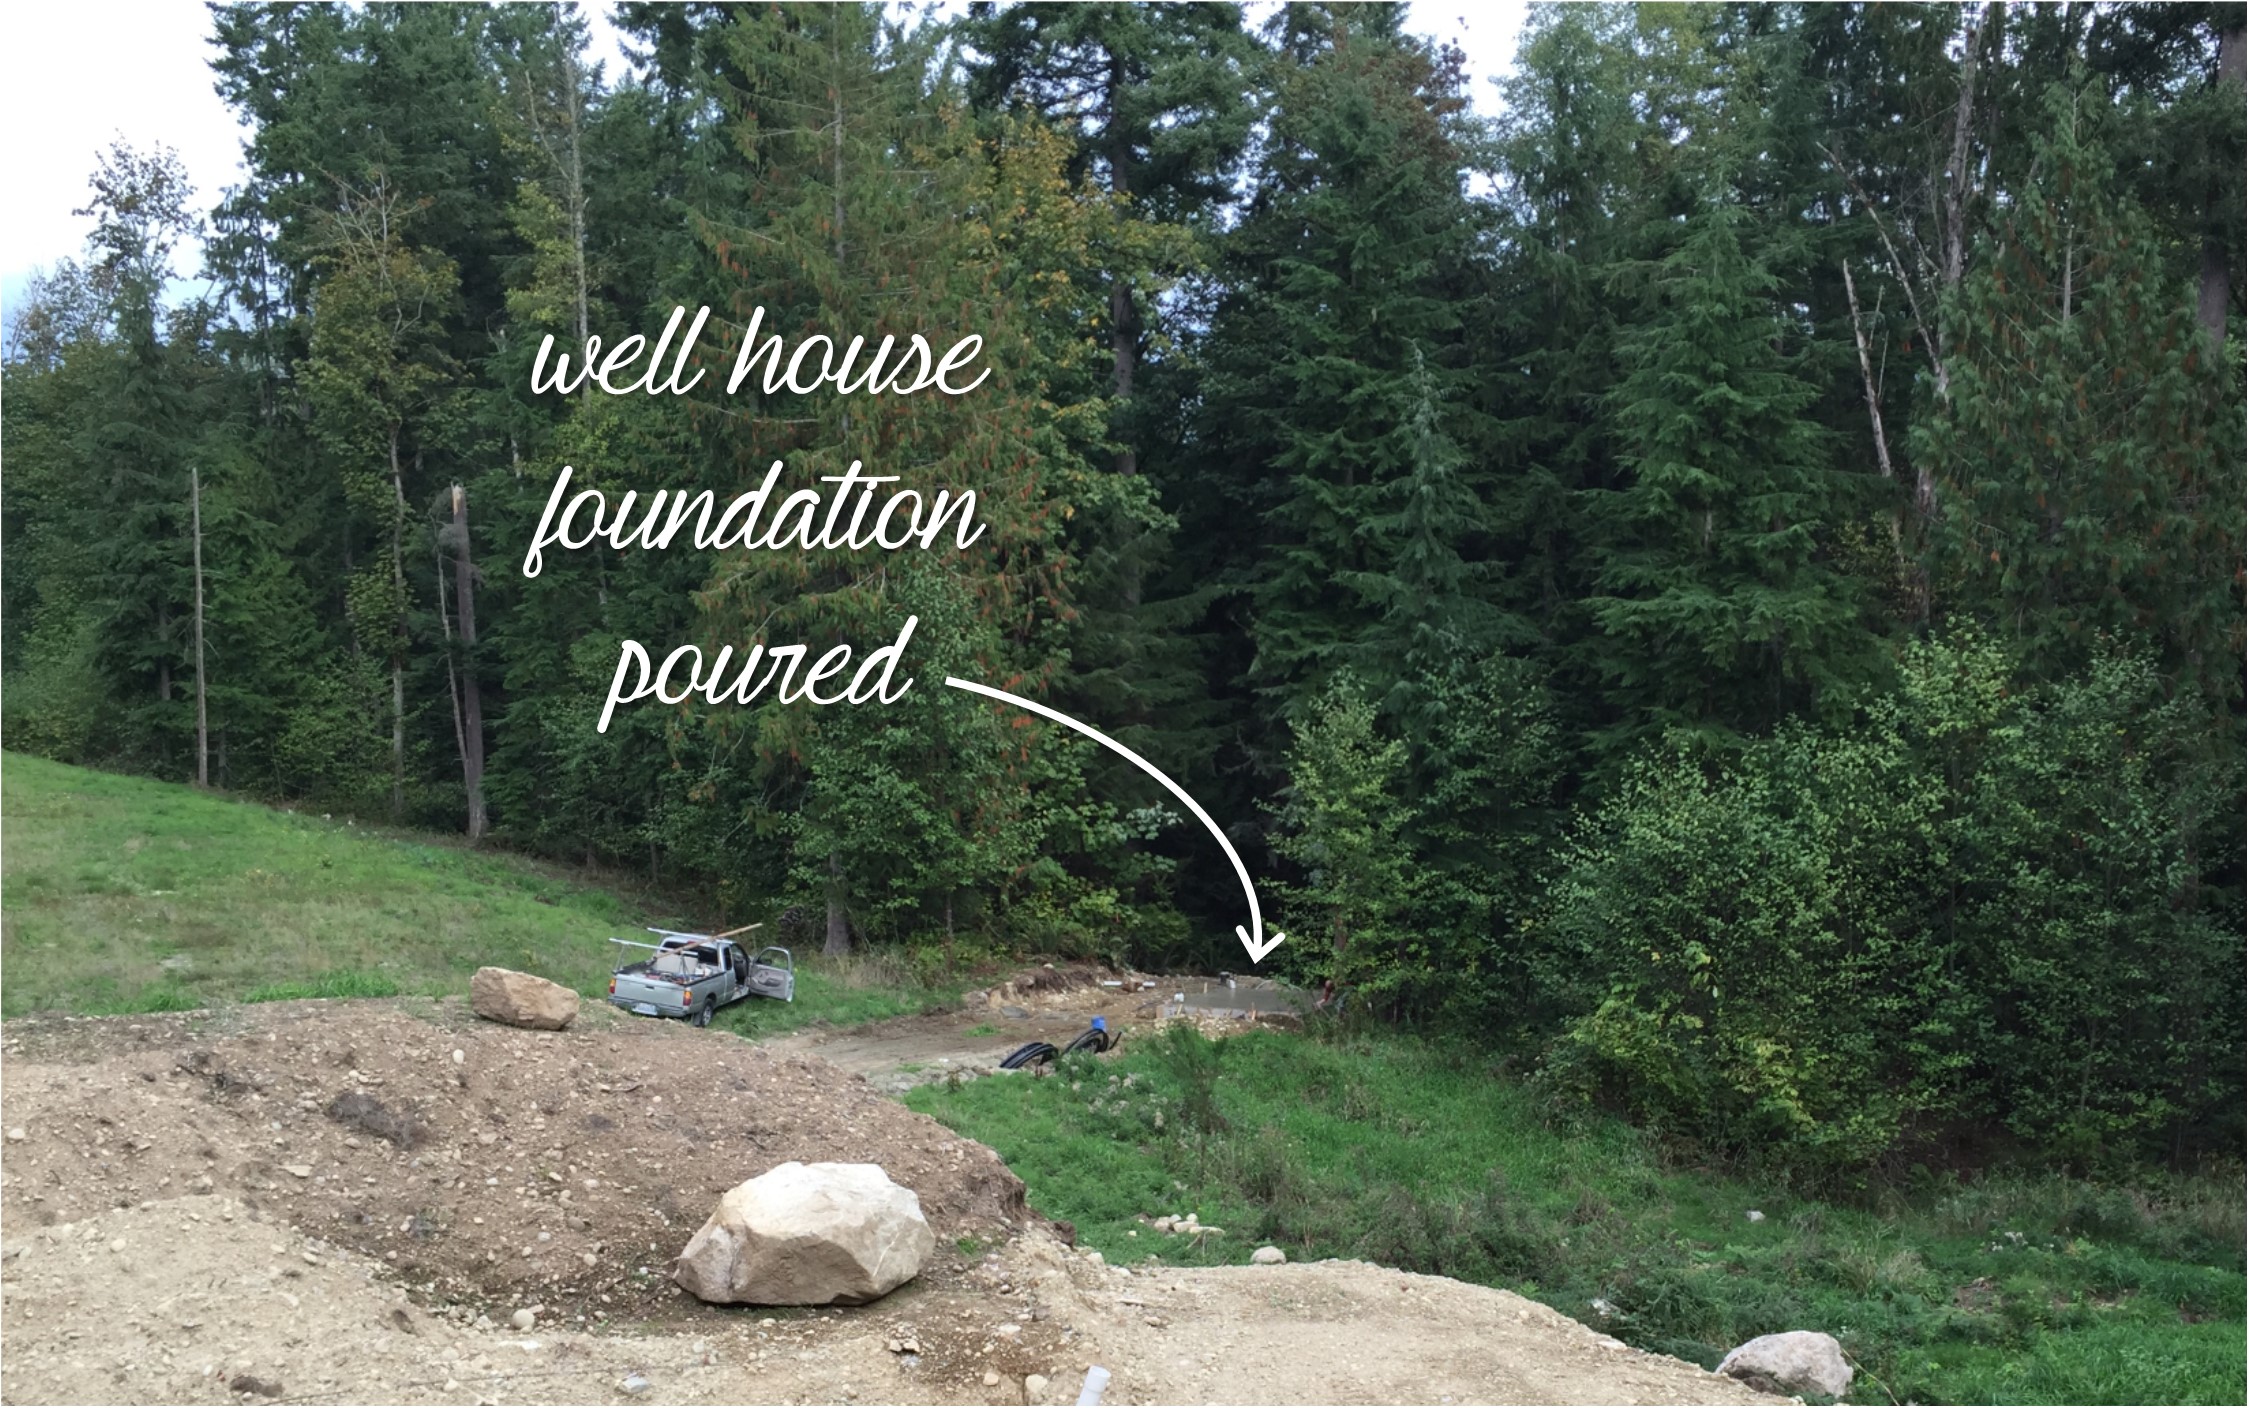
The foundation for the well house was poured this week – a little hard to see, but it’s way down there and actually there’s a guy down there finishing the concrete surface!

Up close pic of the well house foundation slab.